Overview
As an Administrator, you can create and update multiple records using a CSV import. You can also export Registration & Certification information as a CSV file.
Import
As an administrator with the Bulk Upload role, you can use the CSV import functionality.
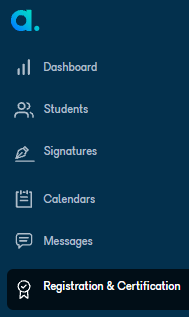
To import Registration & Certification information via CSV, navigate to the Registration & Certification screen. Click Registration and Certification on the left navigation bar. You can see this option when you have the Manage Registration & Certification role.
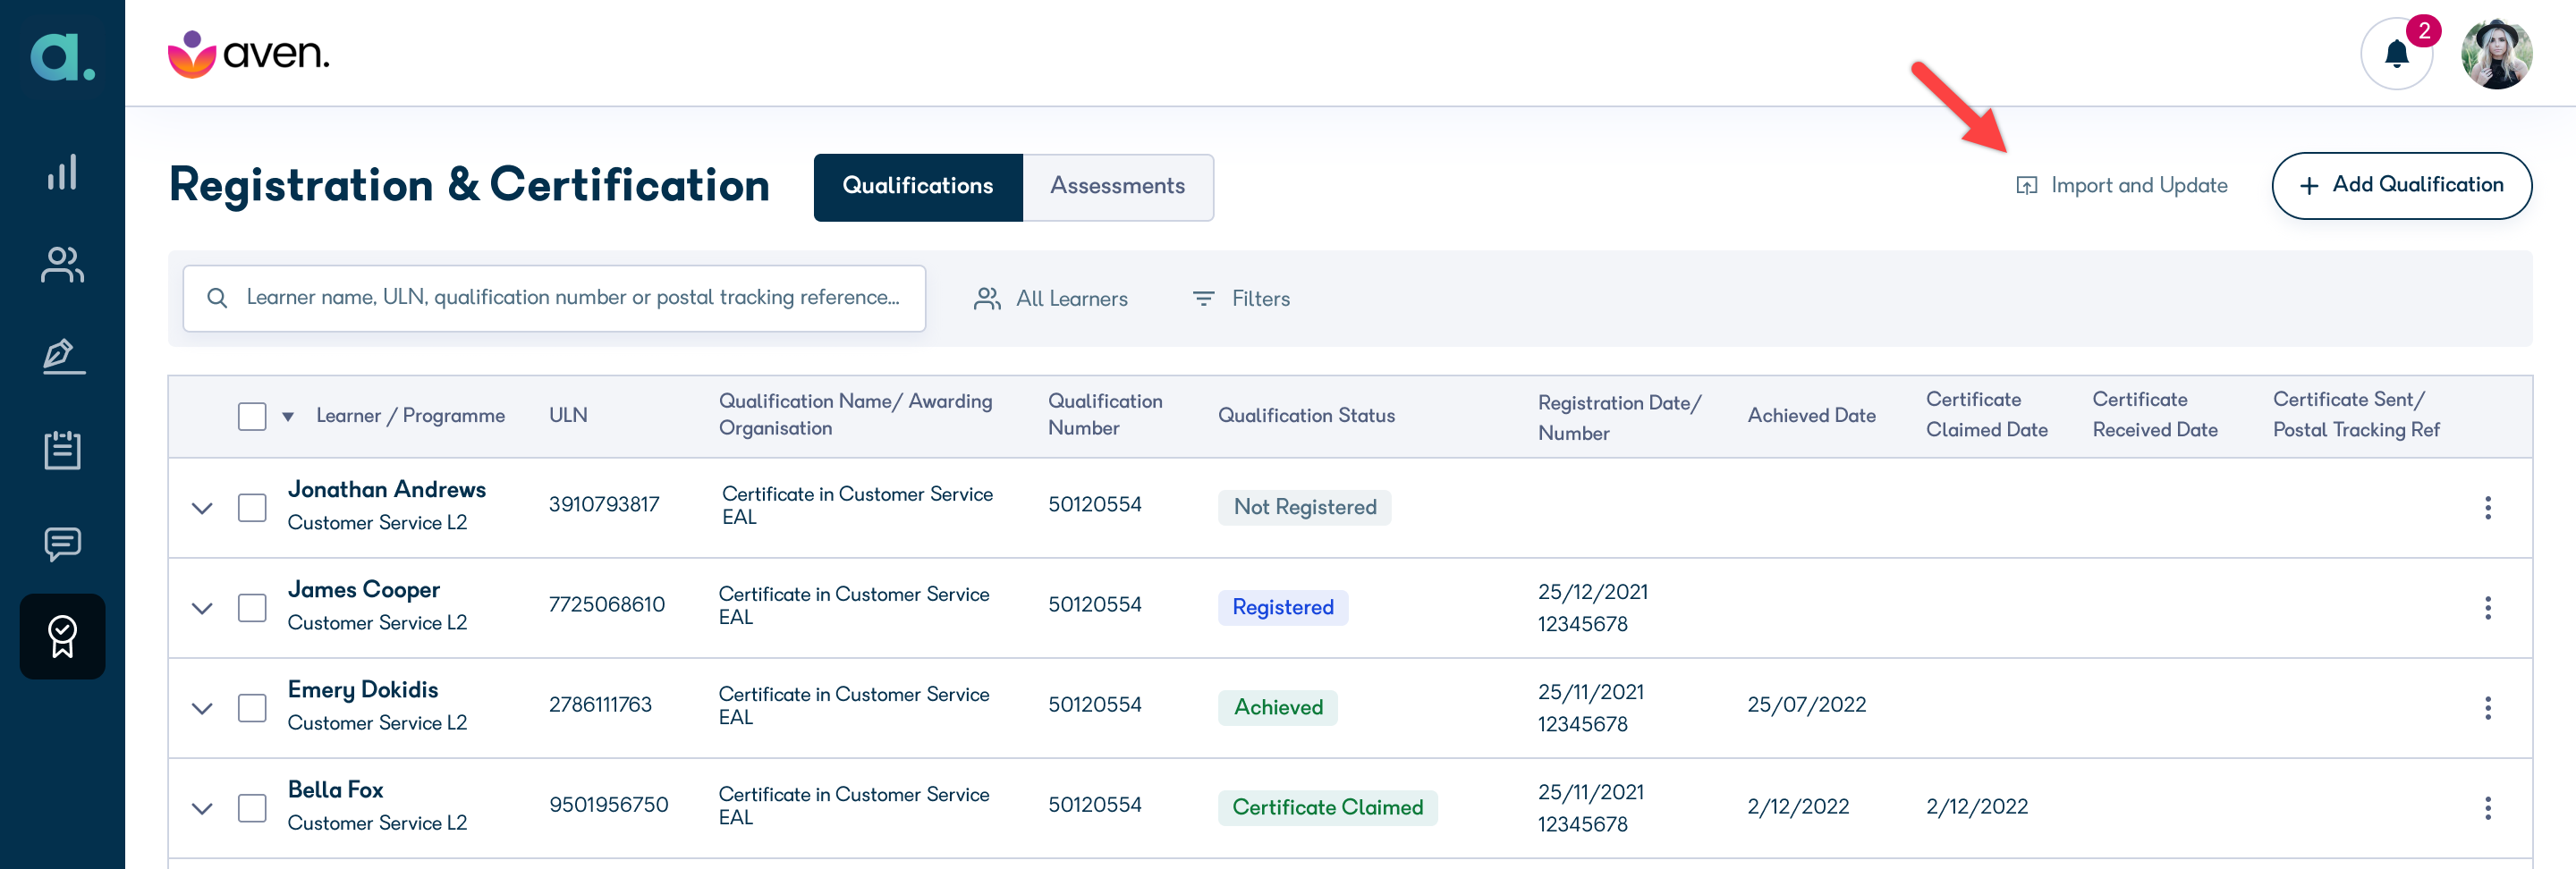
Click Import and Update on the top right of your screen.
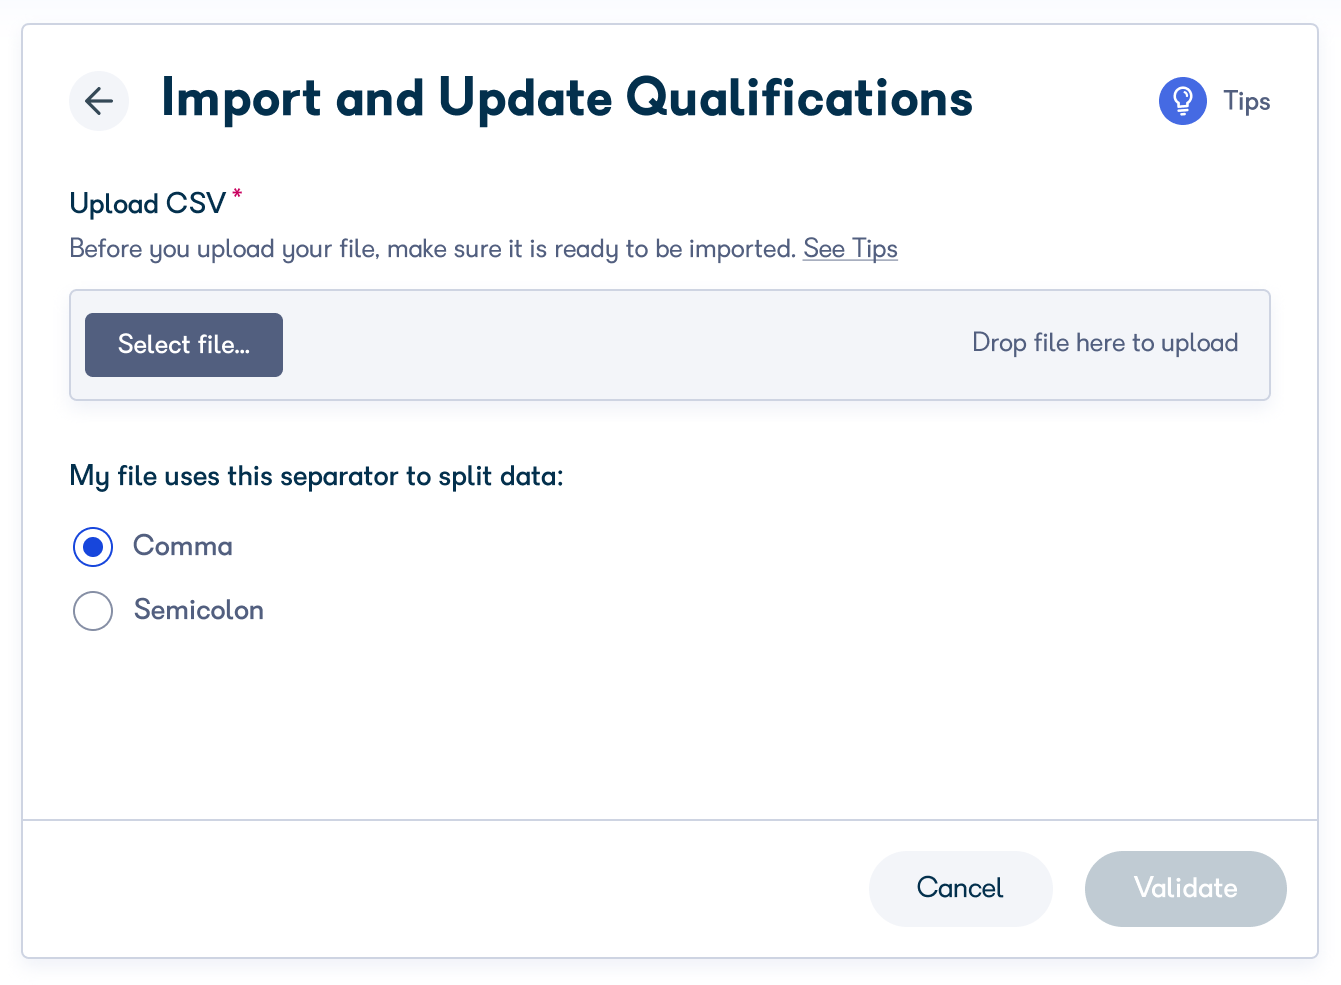
A popup screen is displayed.
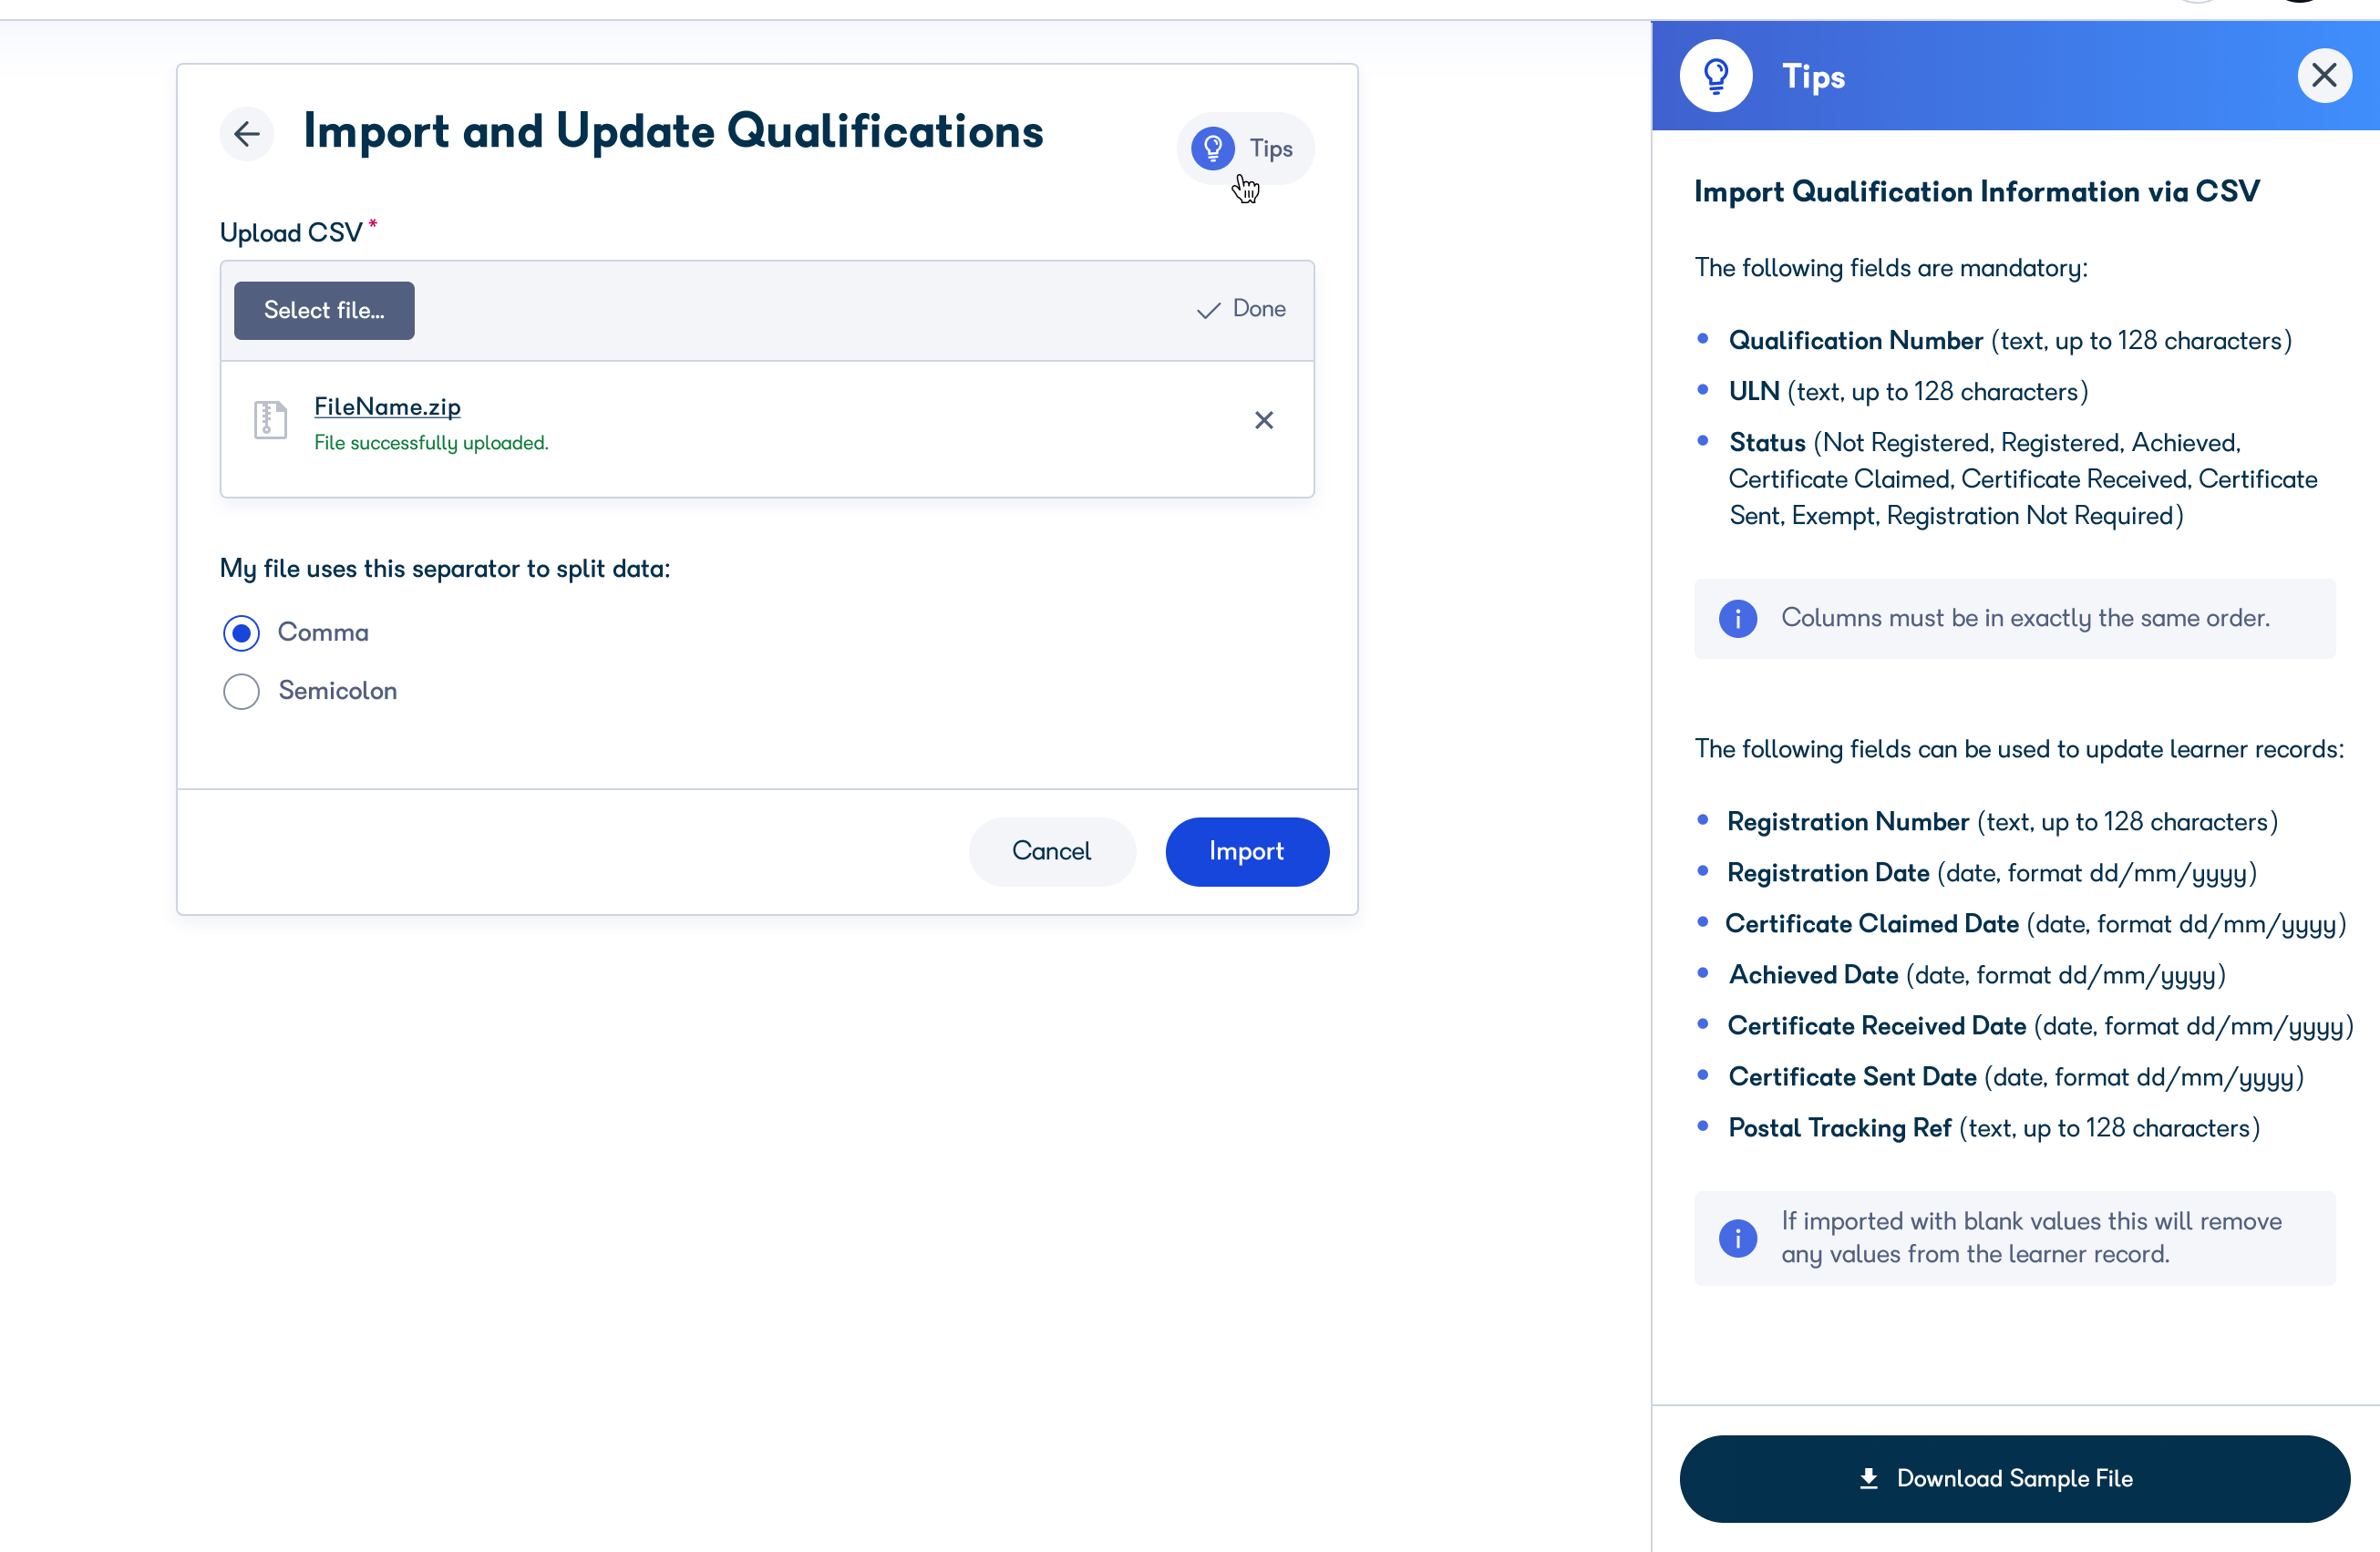
On the Import and Update Qualifications screen, you can click the Tips icon on the top-right.
A sidebar will be displayed - here you can view the details of the mandatory fields required. You can also click Download Sample File to download a sample file that you can use for upload.
Drag and drop the CSV file, or click Select file to browse for the CSV file. Please note that your file must be saved in CSV format, and must be less than 2 MB in size.
Select the separator, this defaults to a comma.
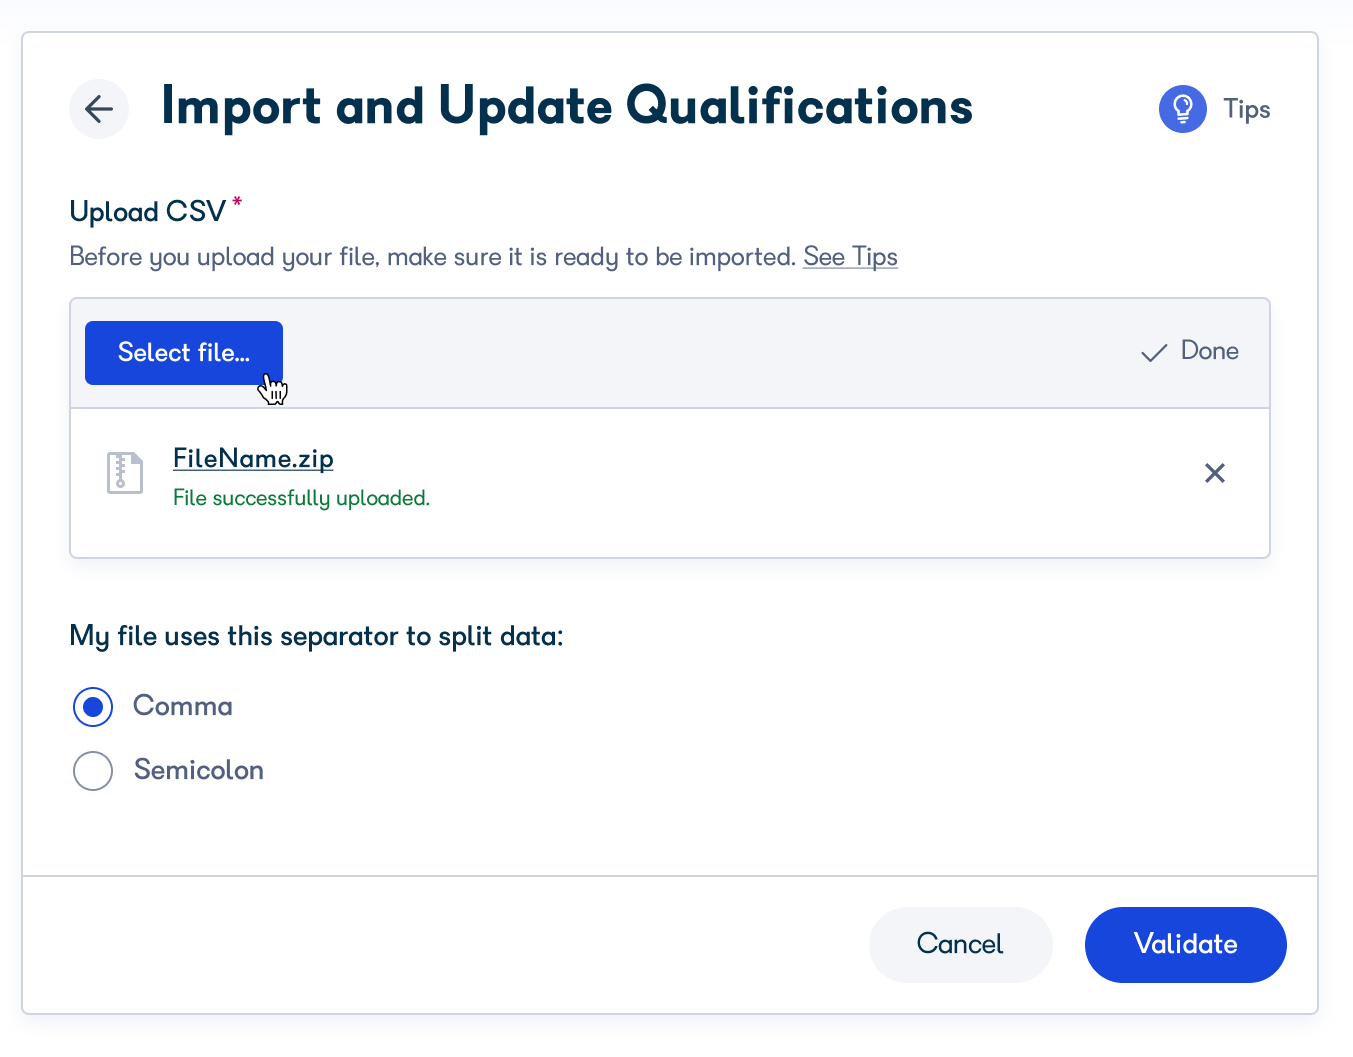
Click Validate.
A Validation Report displays the number of records that can be imported successfully, and the number of errors detected. Above the Errors table, you can locate the option to export the list of errors as a .csv file.
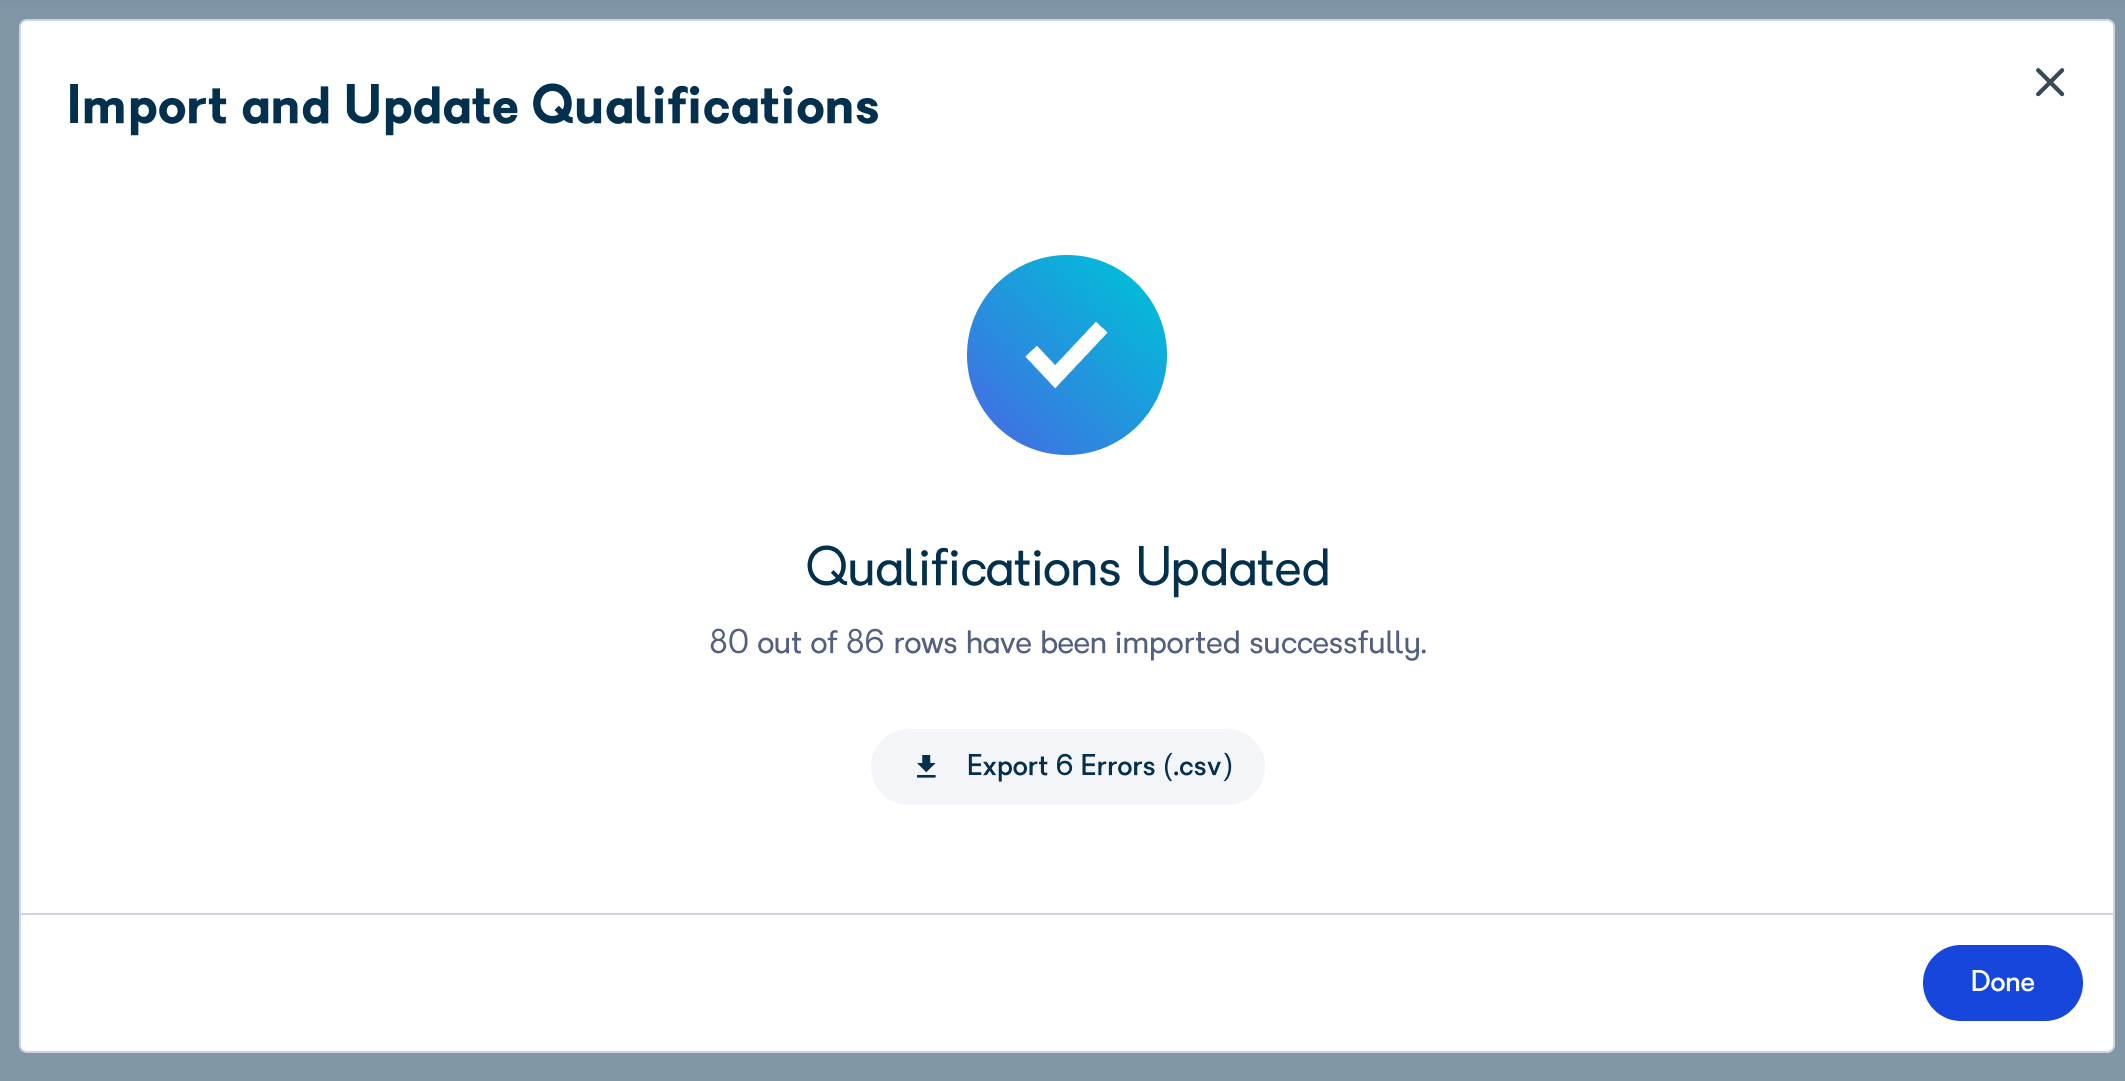
You have the option to cancel the import, or to upload the accepted records.
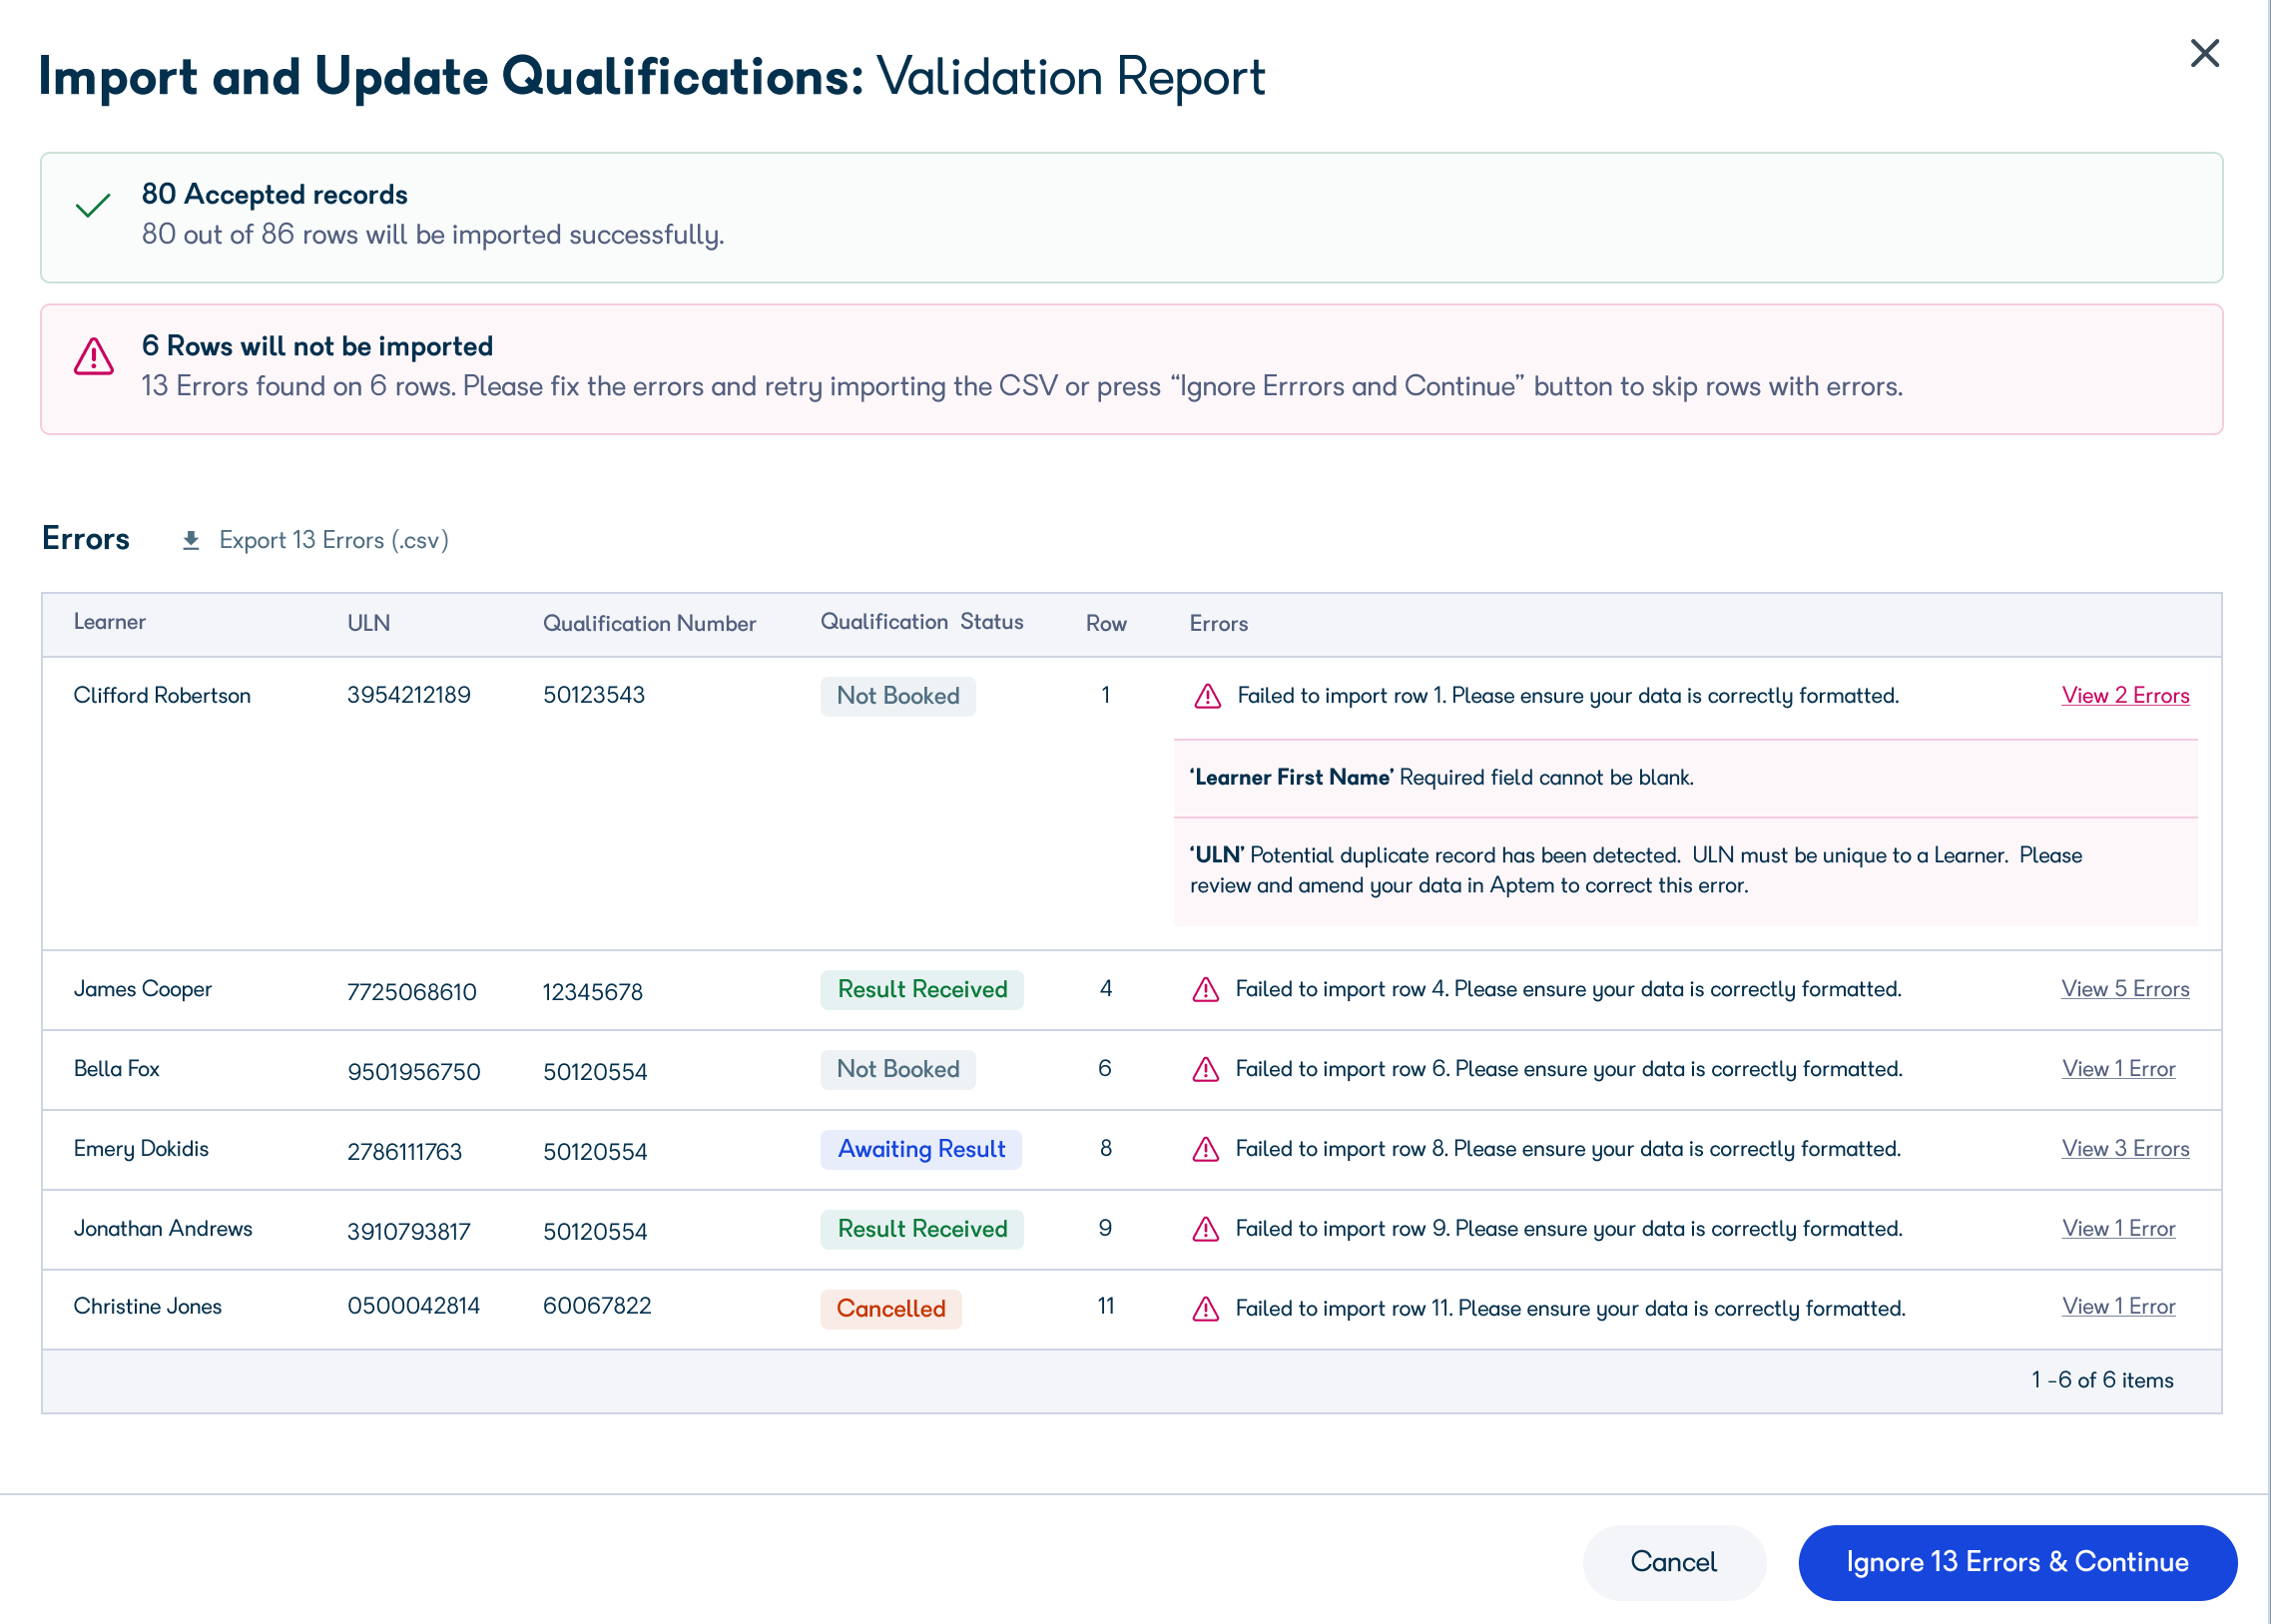
If you continue, the accepted records will be updated. In case of errors, you will be presented with an option to export the list of errors as a .csv file.
Fields in the CSV file
The CSV file should contain the following columns in exactly the same order:
| Column name | type | Details |
|
Qualification Number |
text | up to 128 characters |
| ULN | text | up to 128 characters |
| Status | text | up to 128 characters;
Accepted values: Not registered, Registered, Achieved, Certificate Claimed, Certificate Received, Certificate Sent, Exempt, Registration Not Required |
| Registration number | text | up to 128 characters |
| Registration date | date | format dd/mm/yyyy |
|
Certificate claimed date |
date | format dd/mm/yyyy |
| Achieved date | date | format dd/mm/yyyy |
| Certificate received Date | date | format dd/mm/yyyy |
| Certificate Sent Date | date | format dd/mm/yyyy |
| Postal Tracking Reference | text | up to 128 characters |
- Qualification Number
- ULN
- Status
Notes
- If a record is uploaded without a 'Registration Number', it will be matched only by the ULN and Qualification Number fields, up until it is updated with a Registration Number for the first time.
- When a record is uploaded with the 'Registration Number' for the first time, a match with an empty Registration Number will be found and updated (or created if not found). After that, if you are looking to update this existing record, you should always upload a csv that includes the same 'Registration Number'.
- If you wish to remove the populated 'Registration Number', it is not possible via import. You can only do so via a manual removal process using an 'Edit' form.
- If you try and update to a status that is not permitted without a Registration Number being present, the status will revert.
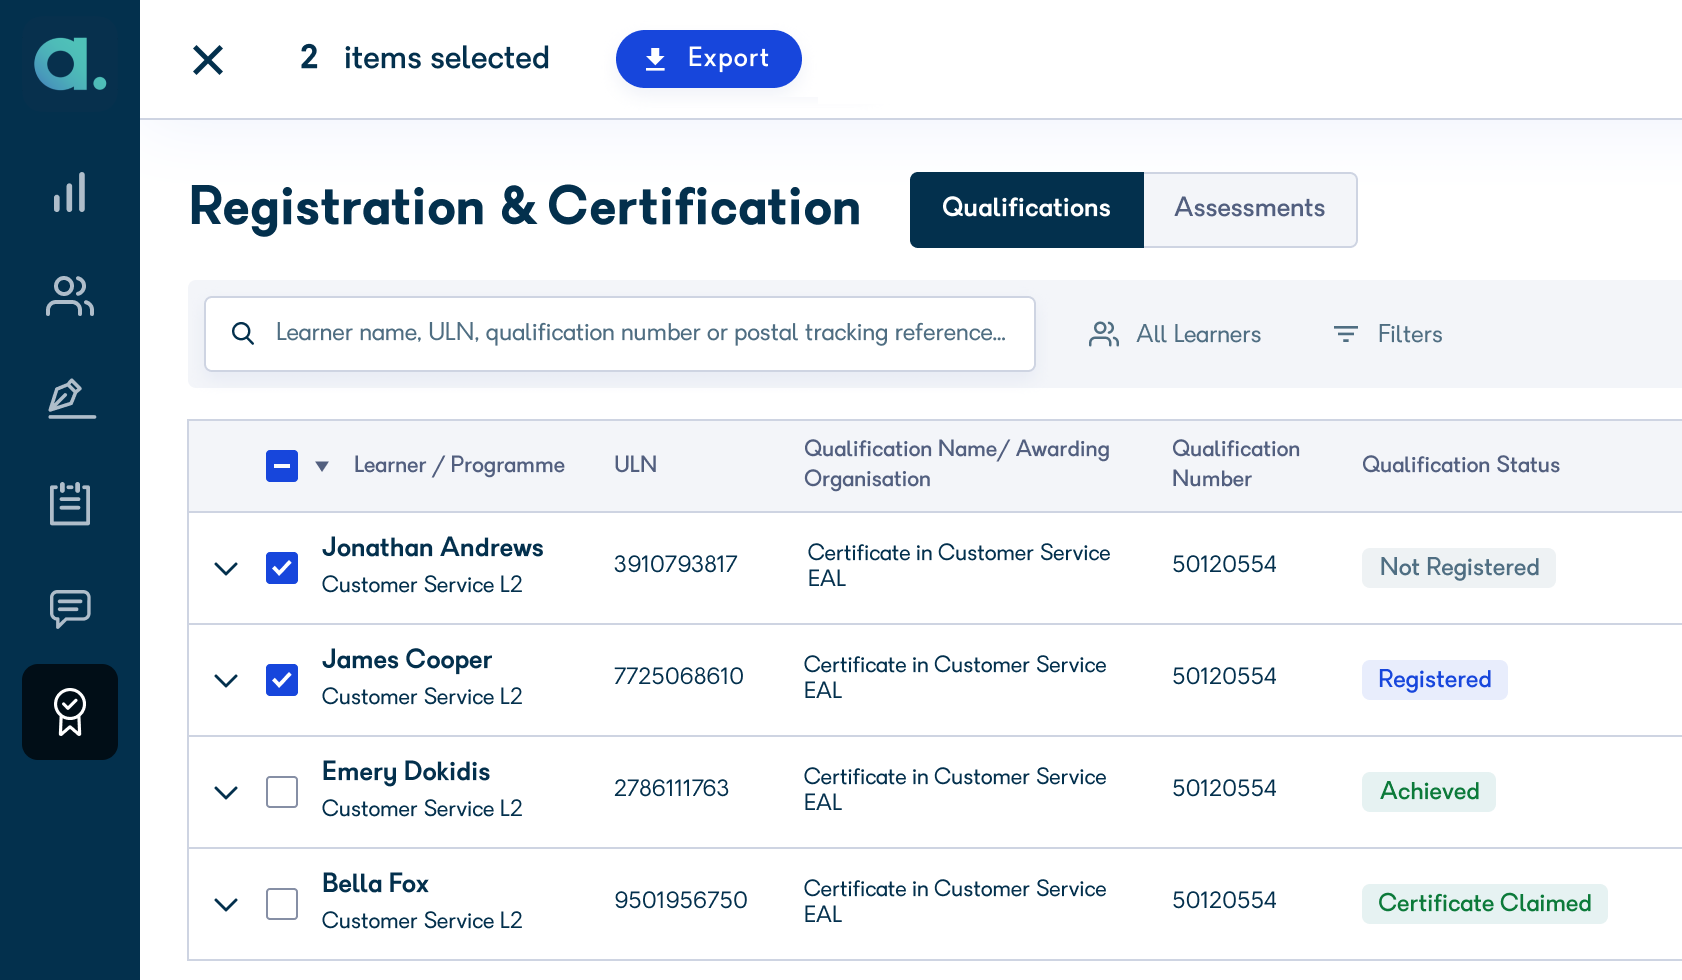
Export Registration & Certification information
As an Administrator with the Data Export role, you can export Registration & Certification information as a CSV file. You can then use this file to provide the Awarding Organisation with data to register multiple learners.
Click Registration and Certification on the left navigation bar. You can see this option when you have the Manage Registration & Certification role.
On the Registration and Certification screen, select the records you want to export. You can select individual records, or you can use the options available in the header row to select all the items displayed on the page, or all the items in the list.
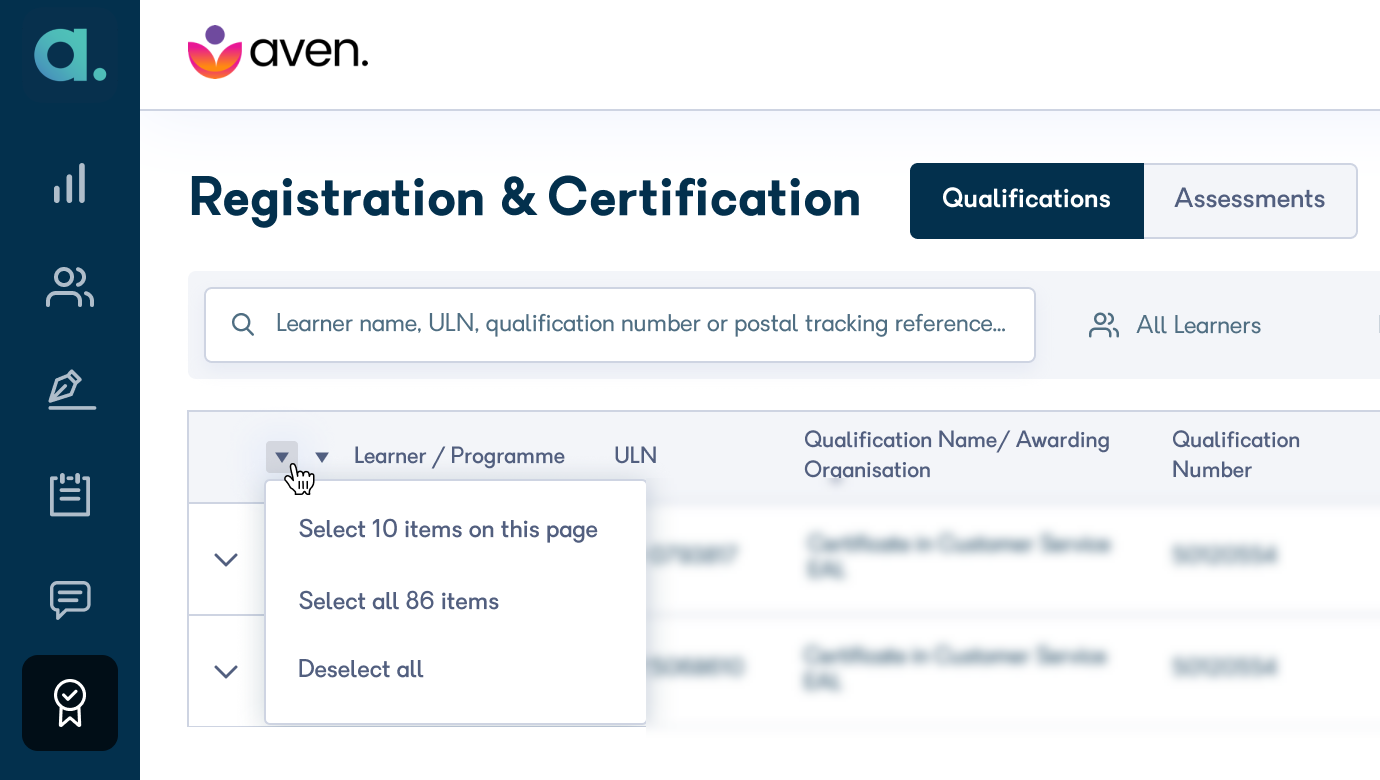
When you select one or more records, a banner on the top of your screen will appear - the banner states the number of items you have selected and gives you the option to export them. To export the records, click Export.
The exported information has the following columns:
- Title
- First Name
- Last Name
- Full Name
- Address Line 1
- Address Line 2
- Address Town/City
- County
- Post Code
- Country
- Date of Birth
- Gender
- Email address
- Ethnicity
- Start Date
- Planned Achievement Date (previously called Completion date)
- Primary Tutor
- Employer*
- ULN
- Programme Name
- Qualification Name (previously called Qualification)
- Qualification number (previously called Aim ref number)
- Awarding Organisation (previously called Awarding body)
- Status
- Registration number
- Registered Date
- Certificate Received Date
- Certificate Claimed Date
- Achieved Date
- Certificate Sent Date
- Postal Tracking Reference
-
QA Verified (A flag to indicate if learner has a ILR status of QA Verified)