Overview
As a Tutor/Administrator, you can view the details of an assessment record from within a learner's profile. You can view the Assessment details and Assessment history for each qualification.
You can also add new assessment records, and edit or delete existing ones.
For reporting purposes, a new OData entity set for Assessments is being created and fields relevant to Assessments will be added to this entity set.
Prerequisites
In order for an assessment to be trackable, the Qualification needs to be present within the
Qualification token on the programme's template.
On the Programme template, navigate to the Qualification token. Ensure that you have added the relevant qualification here.
Additionally, ensure that the following qualification settings are set correctly:
- Internally assessed/externally assessed
- Qualification level, Unit level or Outcome level (Outcome level should be used for English Functional Skills)
Once you have added the relevant qualification, new learners who are then applied to the programme will be given those properties. The qualification will appear on their learner record, and tutors/administrators can then add detail to the assessments.
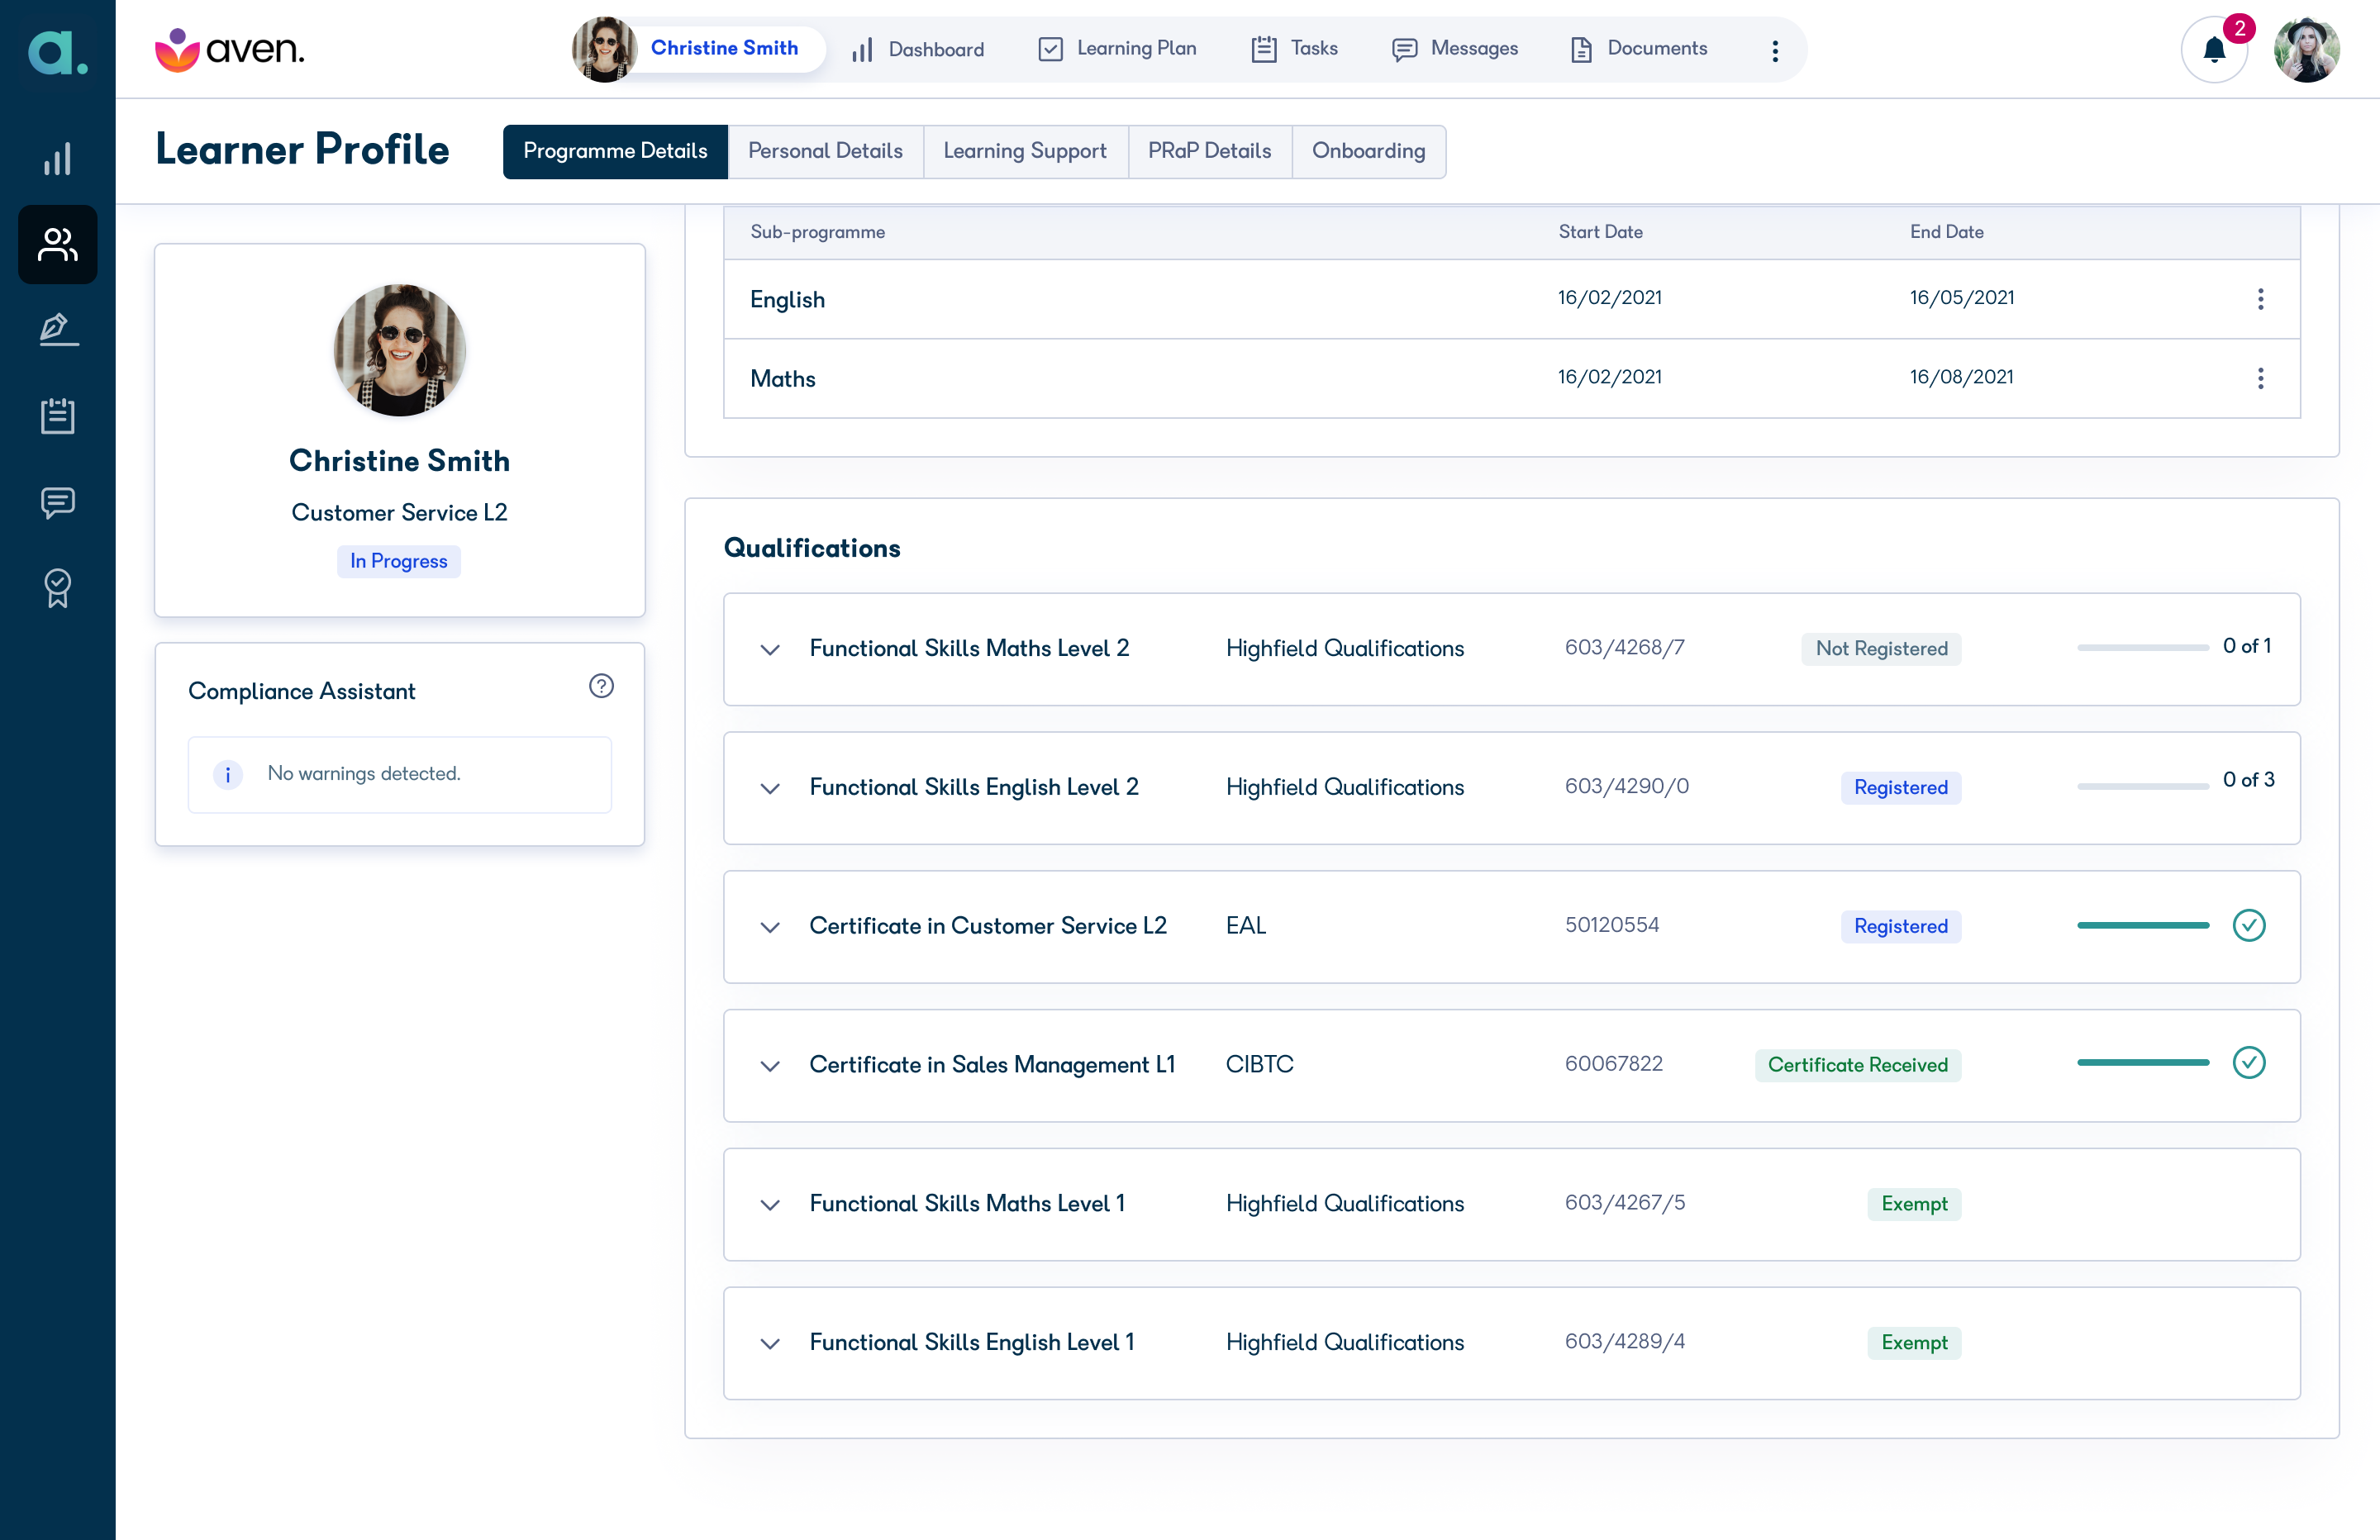
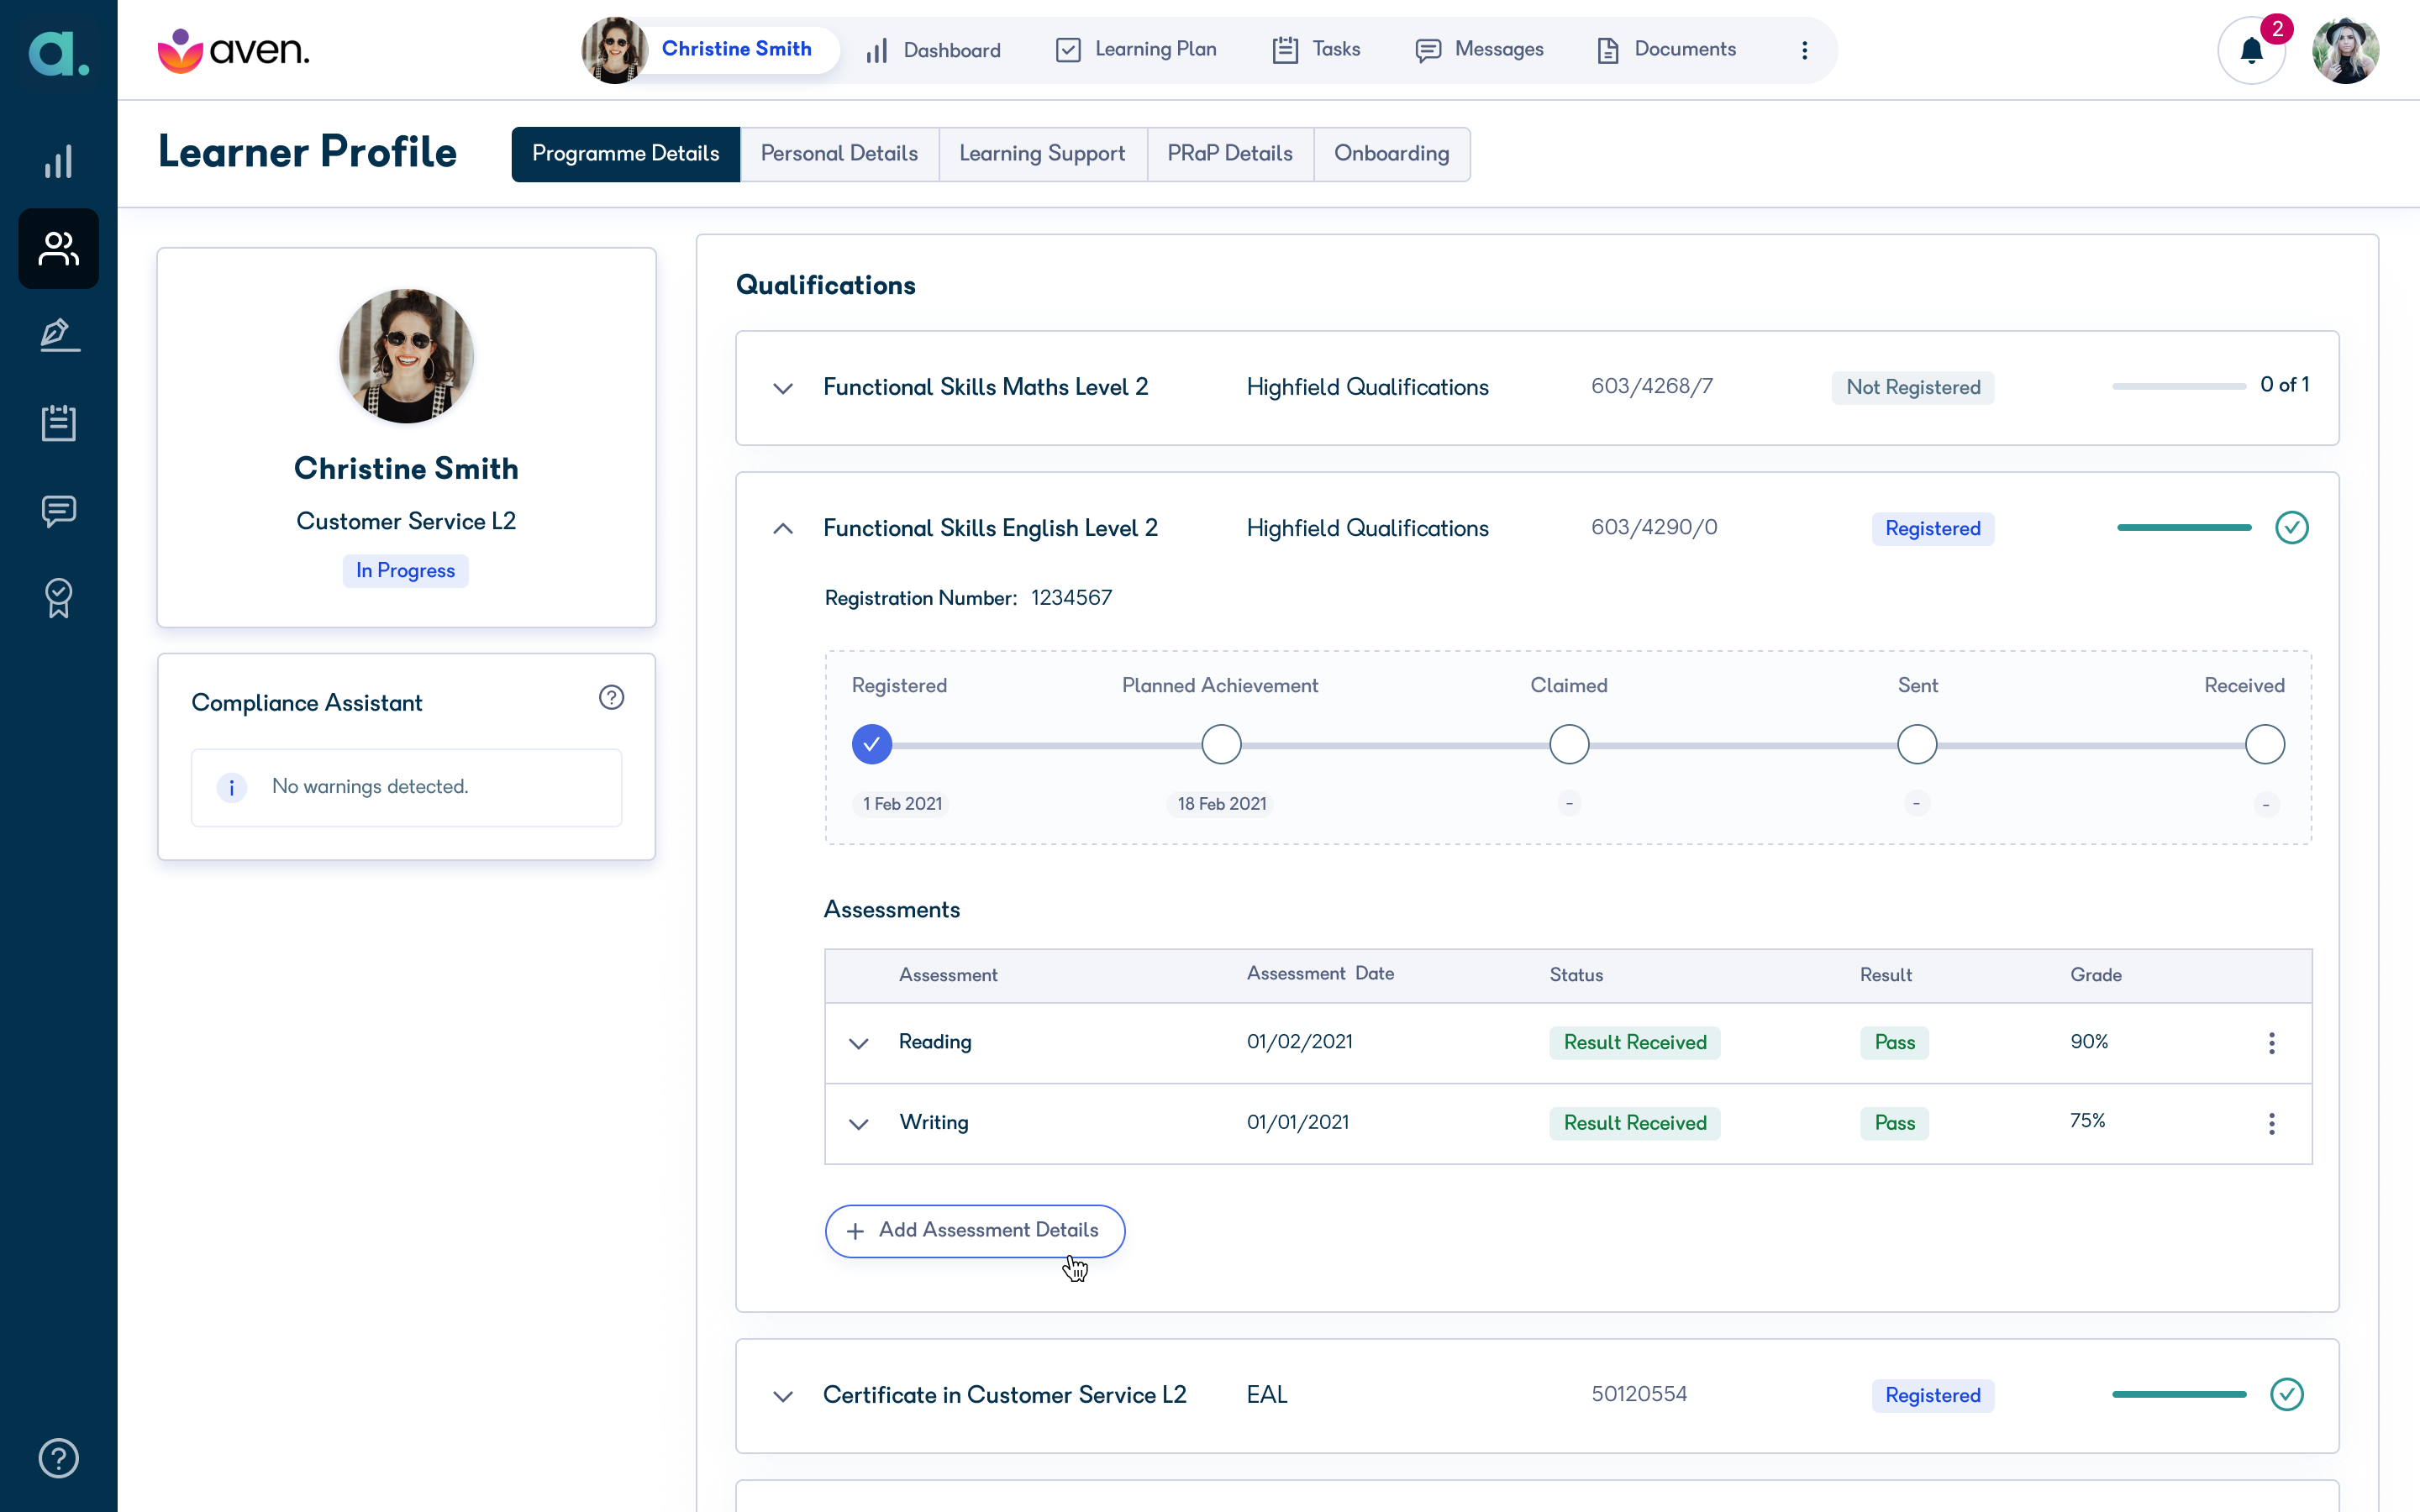
Qualifications section on the Learner Profile
On the Programme Details tab, the Qualifications section shows a list of qualifications, with a progress bar against each qualification.
The progress bar to the right of the current registration status shows the current progression against the number of assessment records present for the qualification record. For qualifications where all assessment records have a "Result Received" state and a "Result" set to "Pass", you can see a green progress bar, and a green tick icon. For qualifications where all the assessments have not been completed, you will see a blue progress bar.
The numbers beside the progress bar indicate how many assessments have taken place against how many are being tracked.
View Assessment details and Assessment history
Expand the qualification to view the registration number, a timeline for the Registration & Certification and the Assessment details for each Qualification that is being tracked.
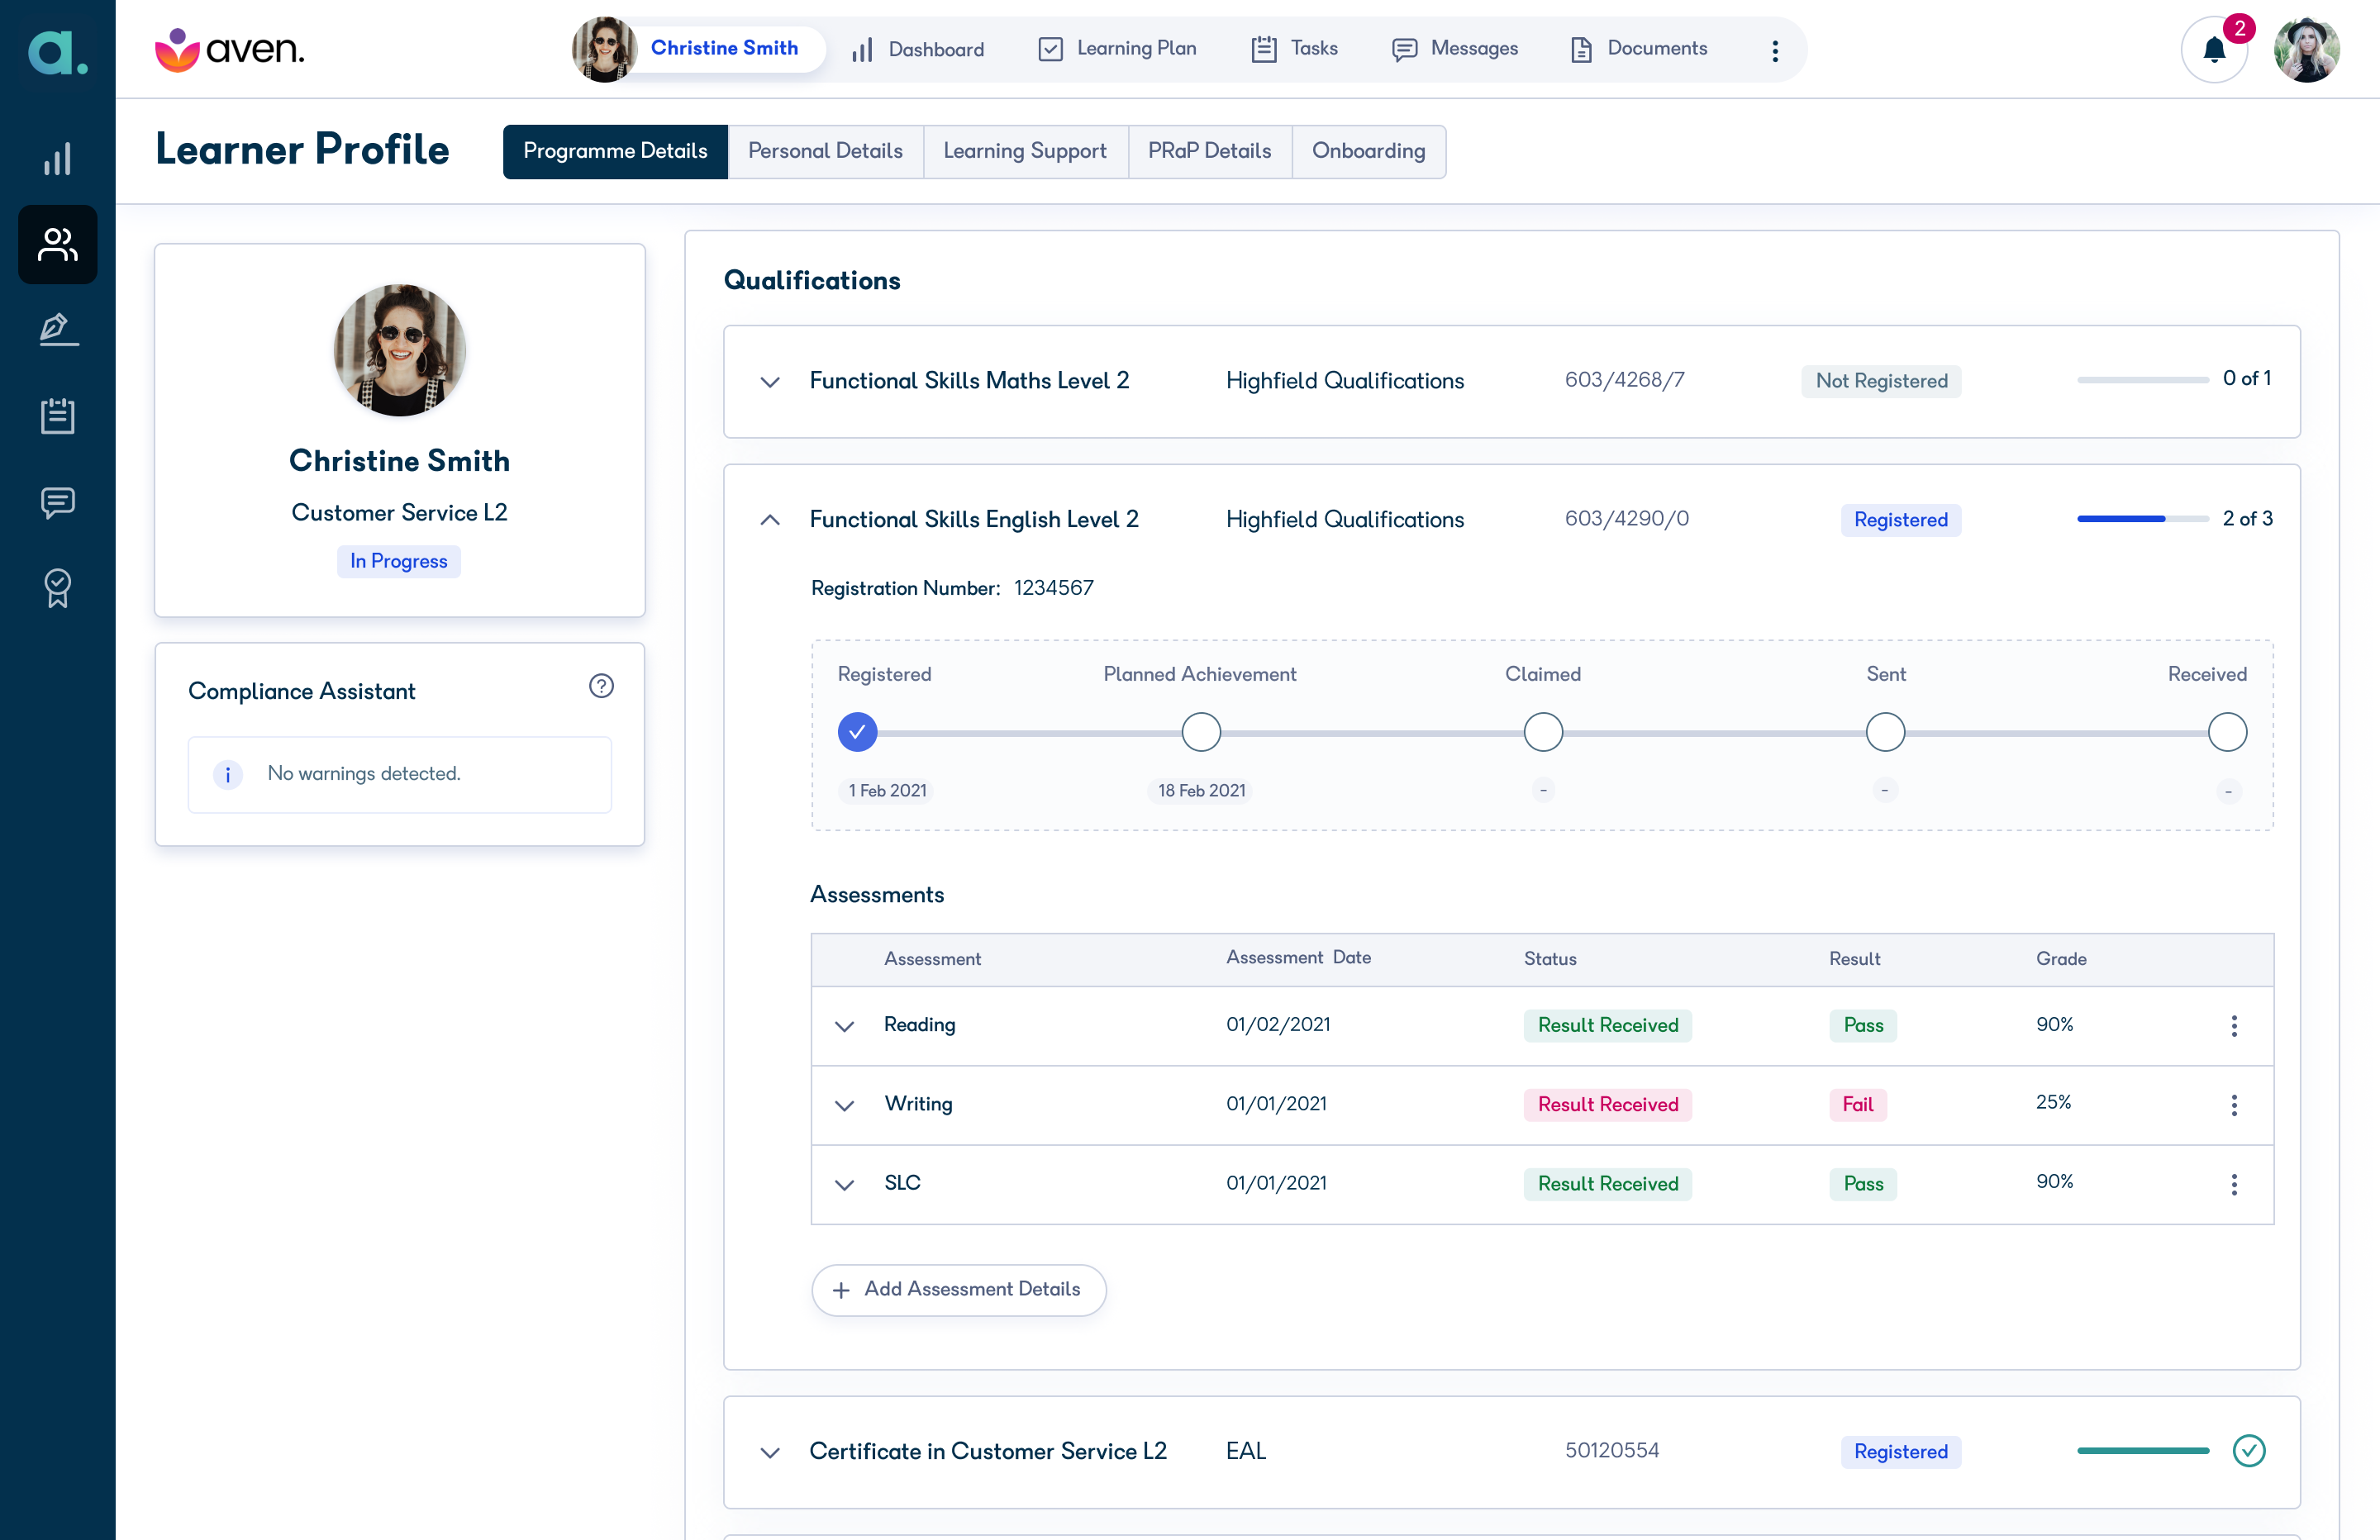
The Assessment grid has the following sortable columns:
-
Assessment: The name of the Assessment that has been selected when adding an assessment record.
-
Assessment Date
-
Assessment Status
-
Result
-
Grade
Where an assessment record has a status other than "Not Booked", you can view the expand option on the grid. Expand the assessment to view the assessment history.
The history shows all the changes made to the assessment record in chronological order. It shows the following statuses and associated details.
- Booked - with the Assessment date.
- Cancelled - with the date of cancellation.
- Awaiting Result
- Result Received - along with result and grade.
In the following example, you can view a complete Assessment history for that particular reading exam.
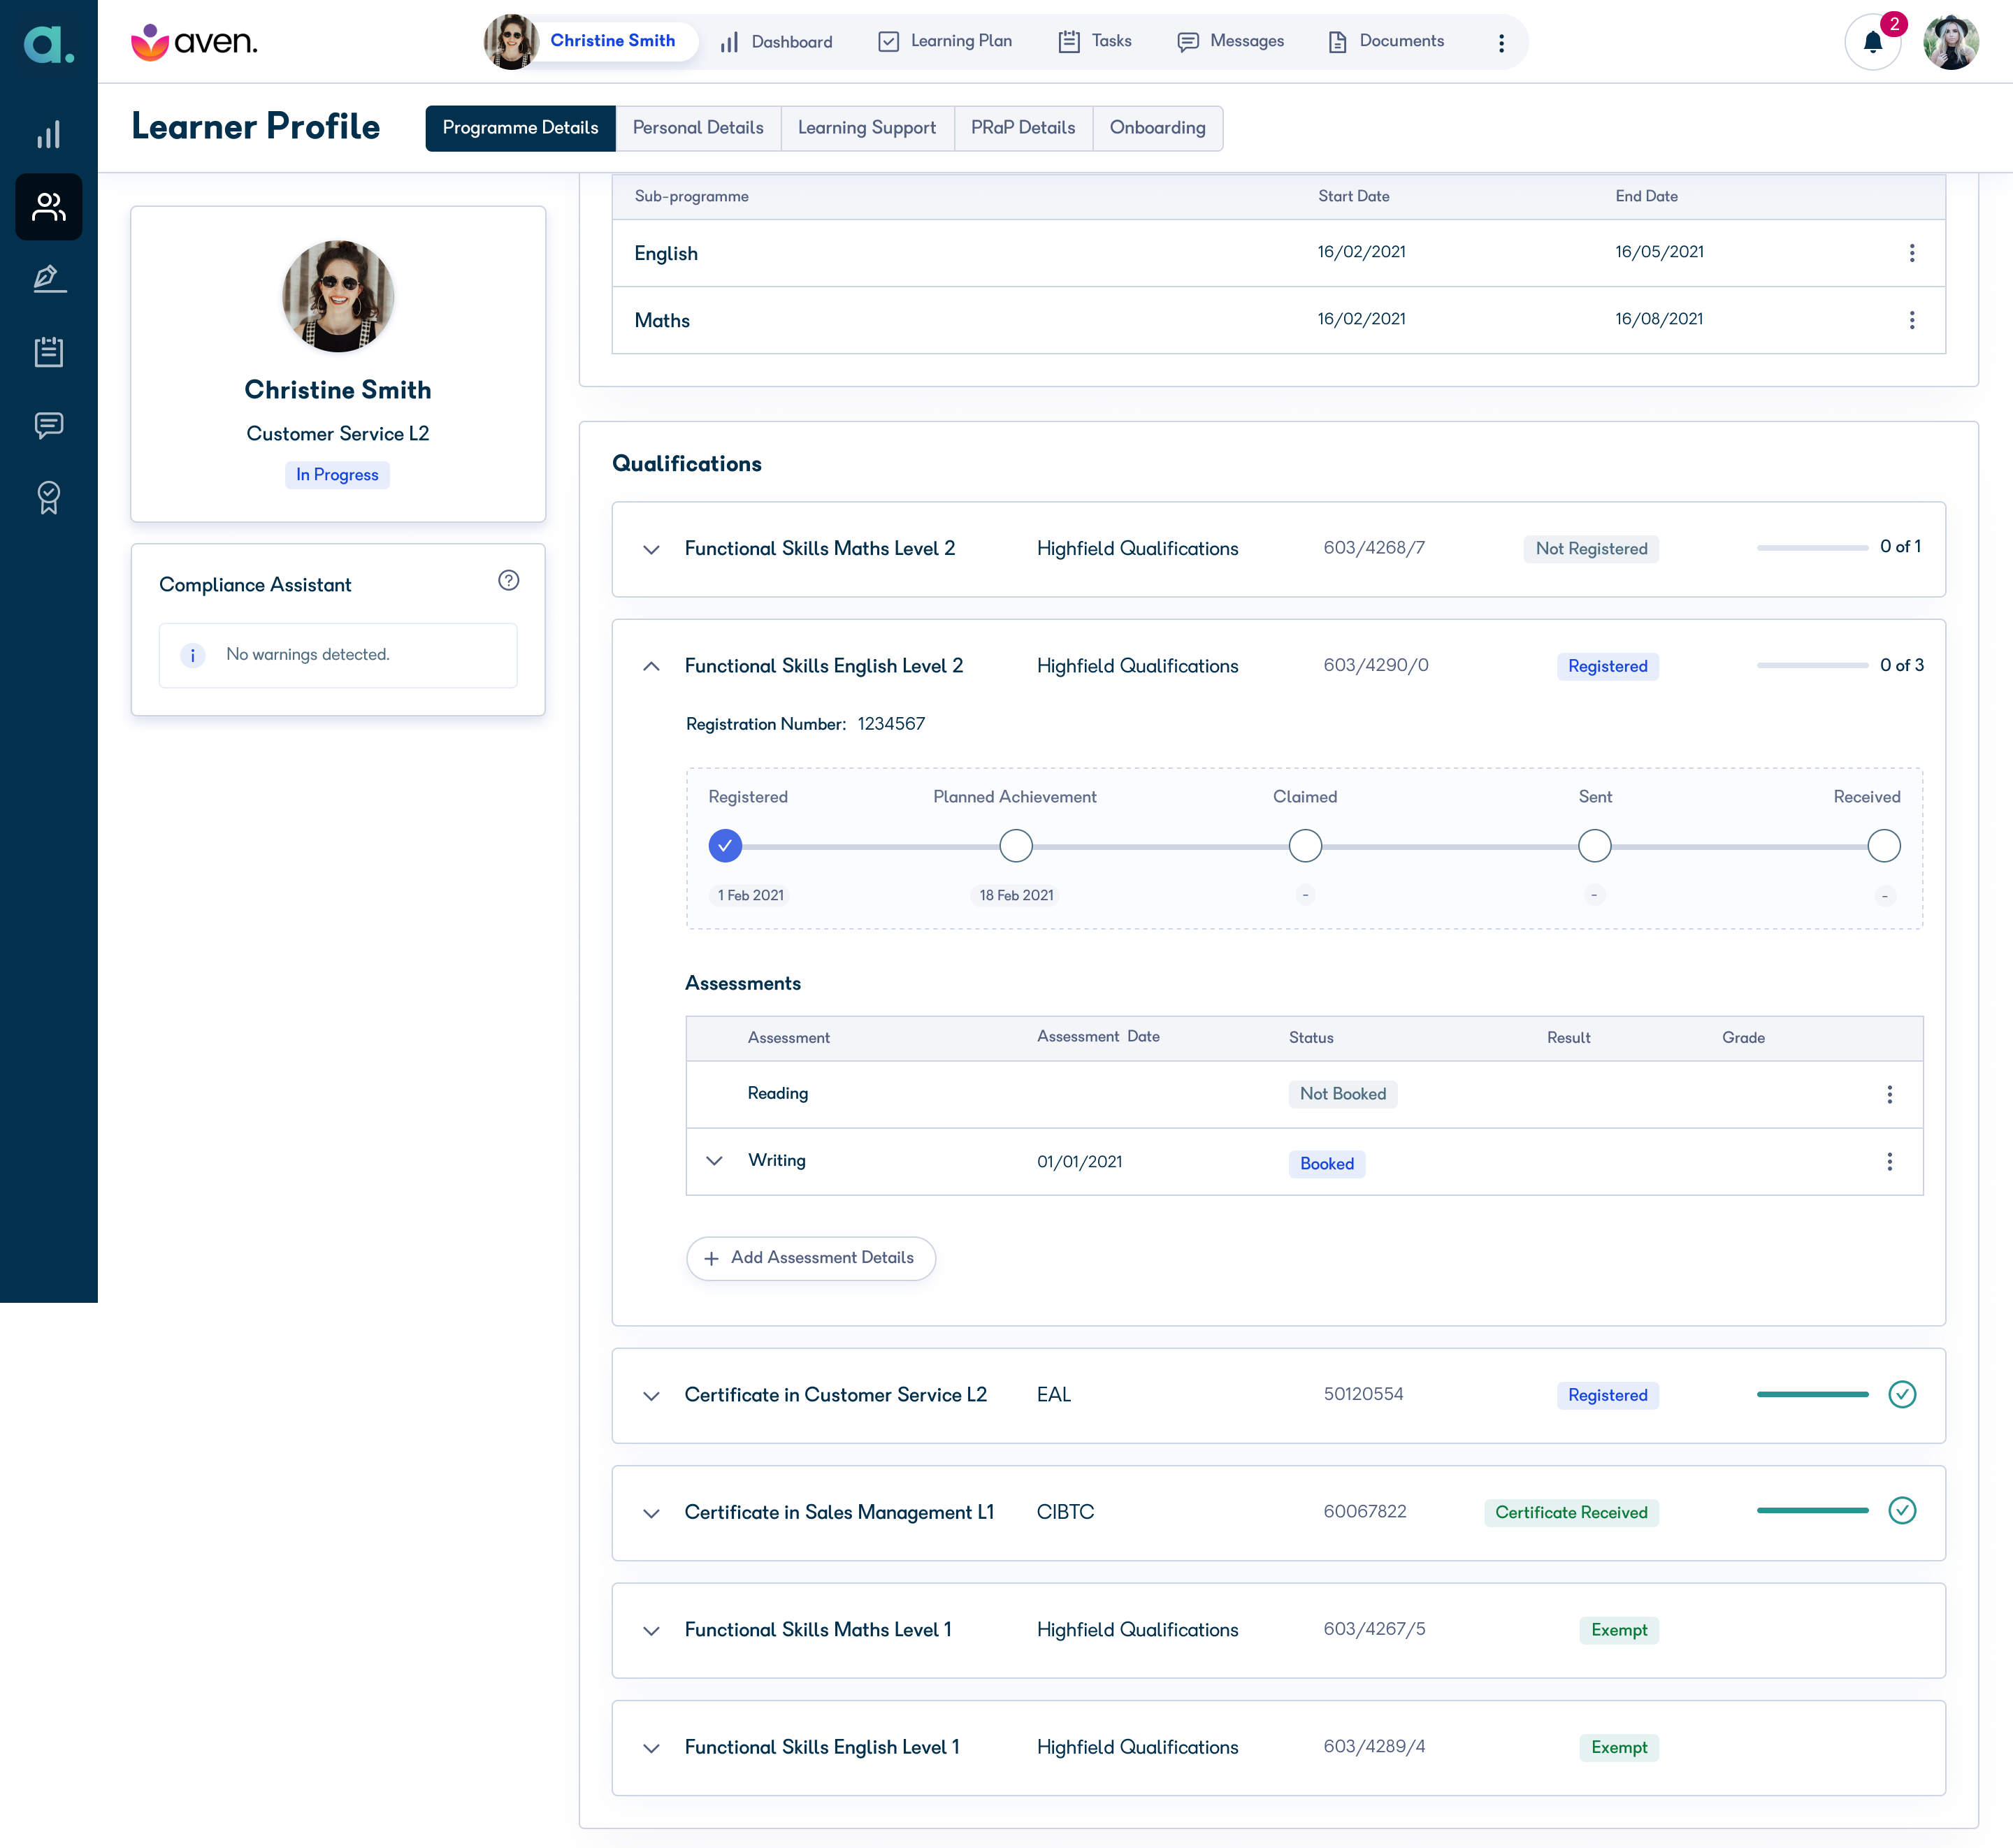
Add an Assessment record
As a Tutor, you can record the details of an assessment from within a learner's record on their profile.
On the learner profile, navigate to the Programme details tab. On the Qualifications section, expand the qualification to which you wish to add an assessment record. Click Add Assessment Details.
On the Add Assessment Details screen, you can view the pre-populated Qualification and the Assessment level details.
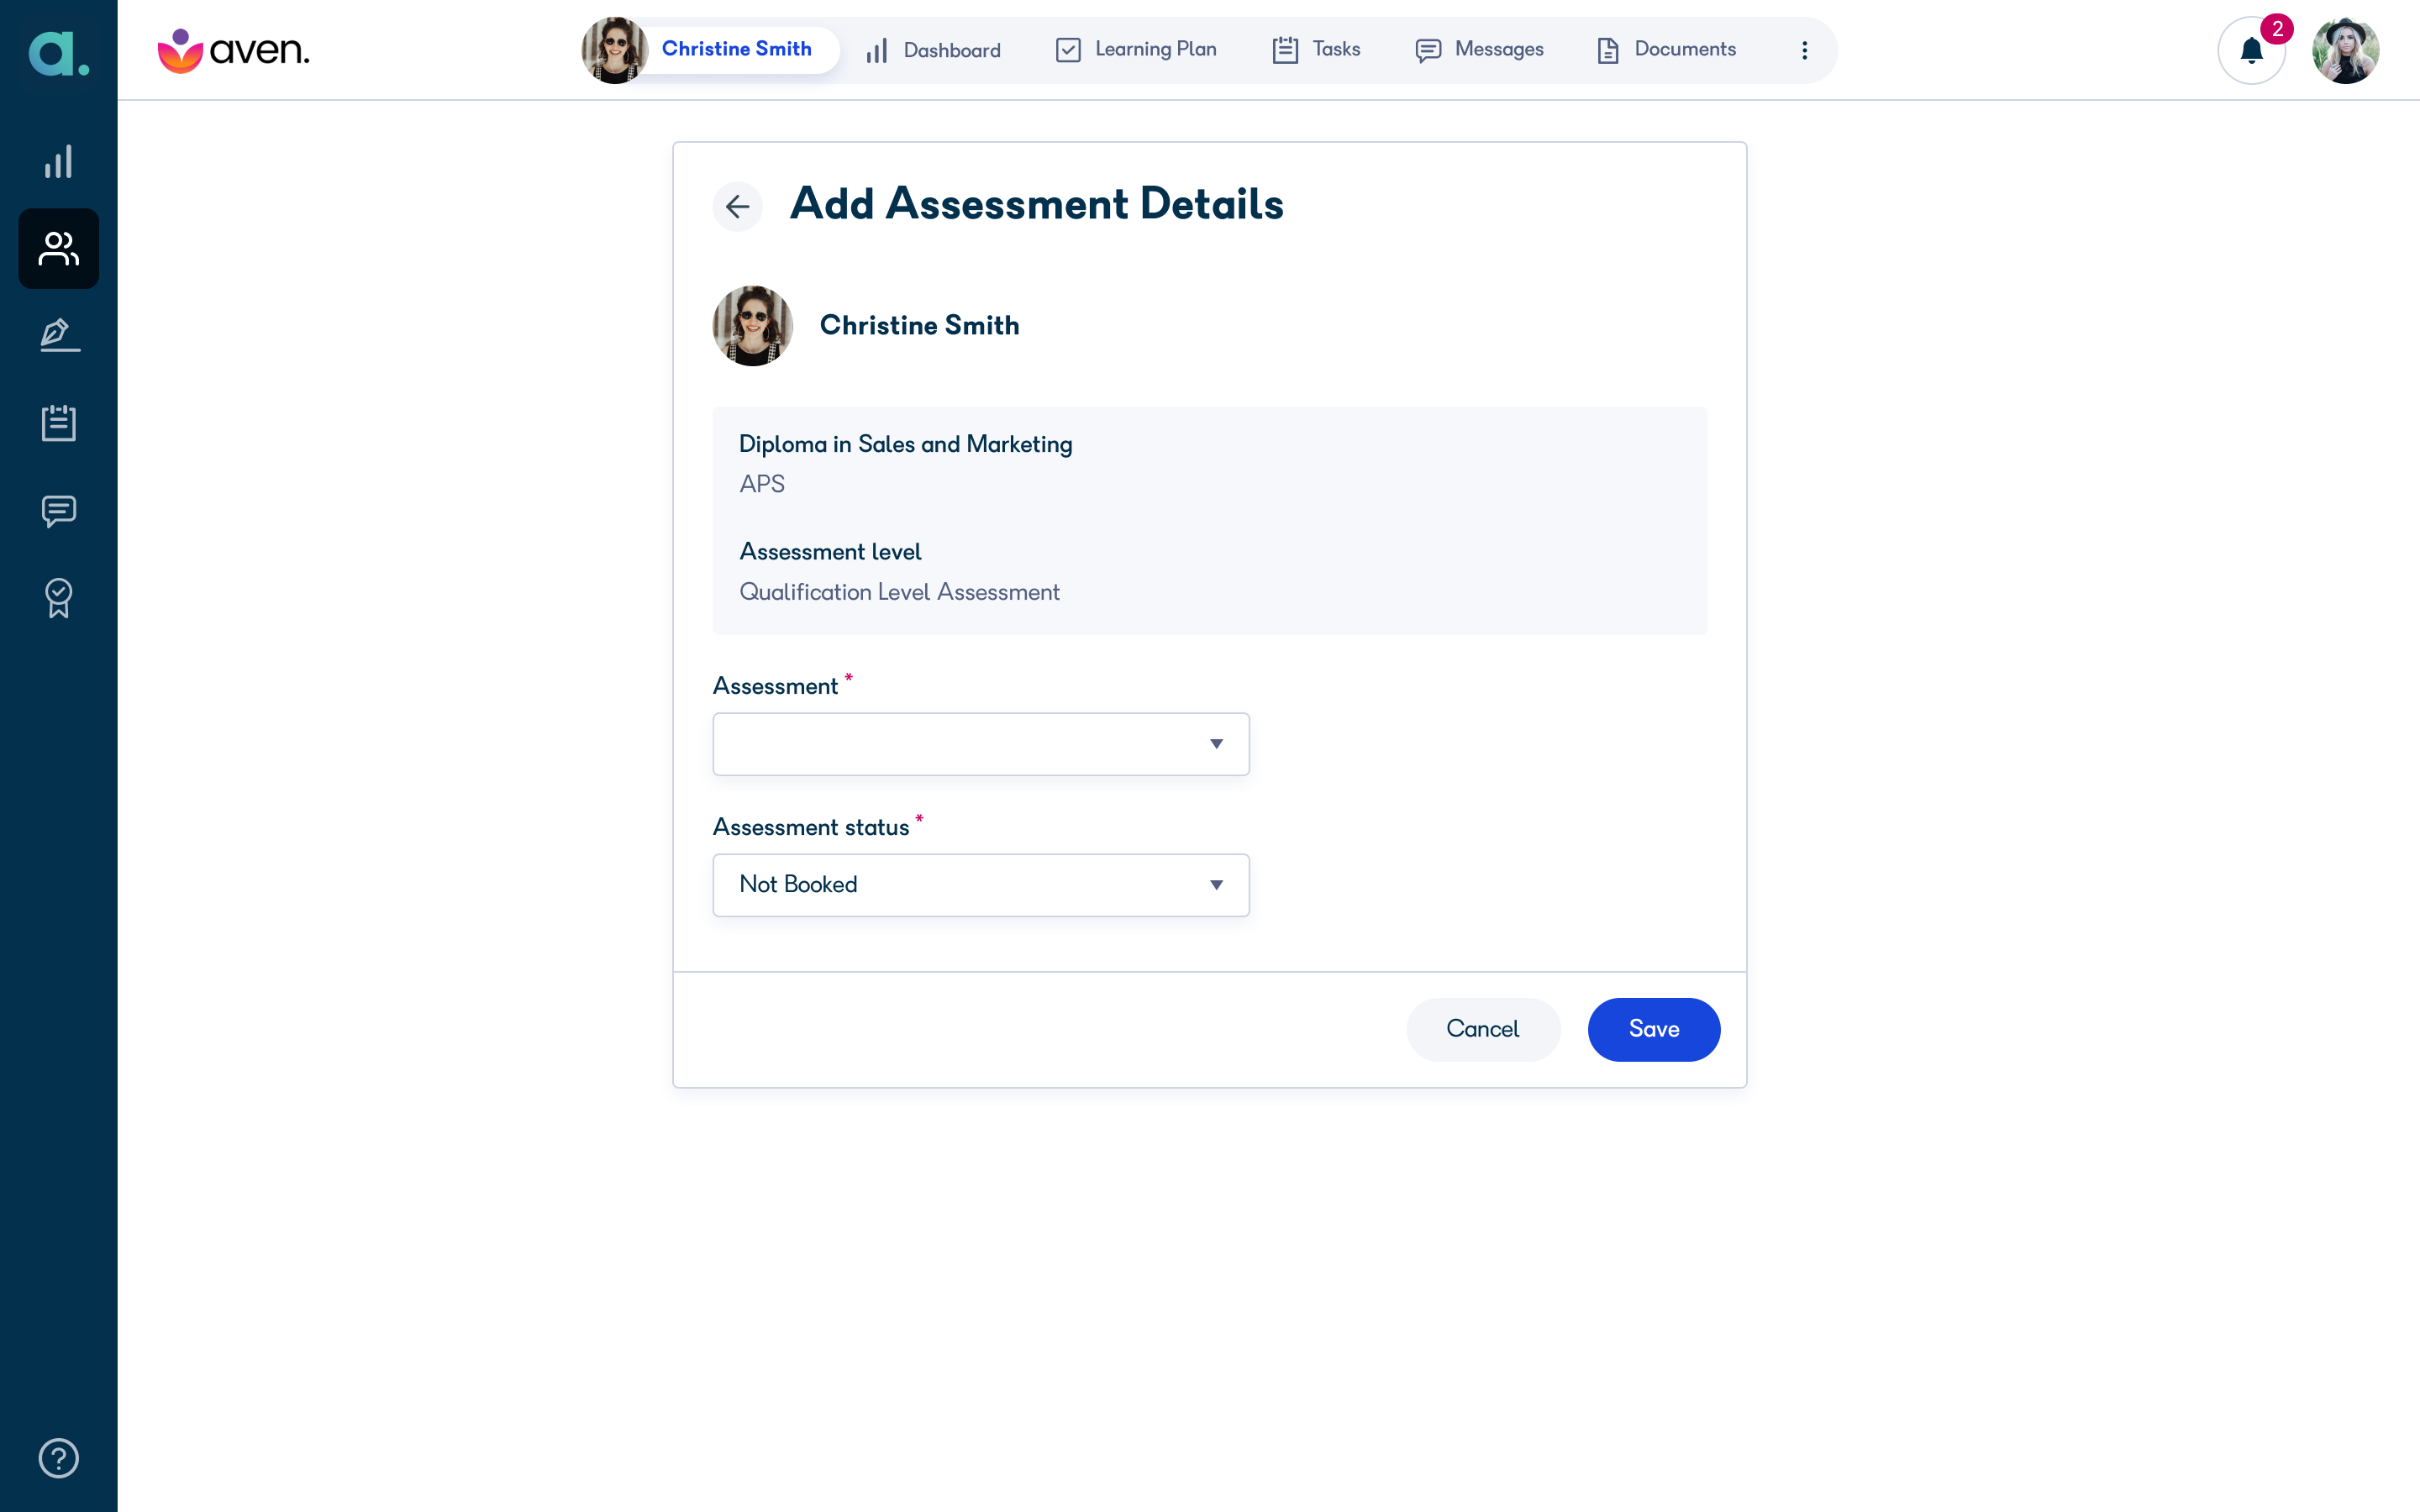
As you populate the fields, you will be presented with additional fields to complete.
After you enter the assessment record details, click Save.
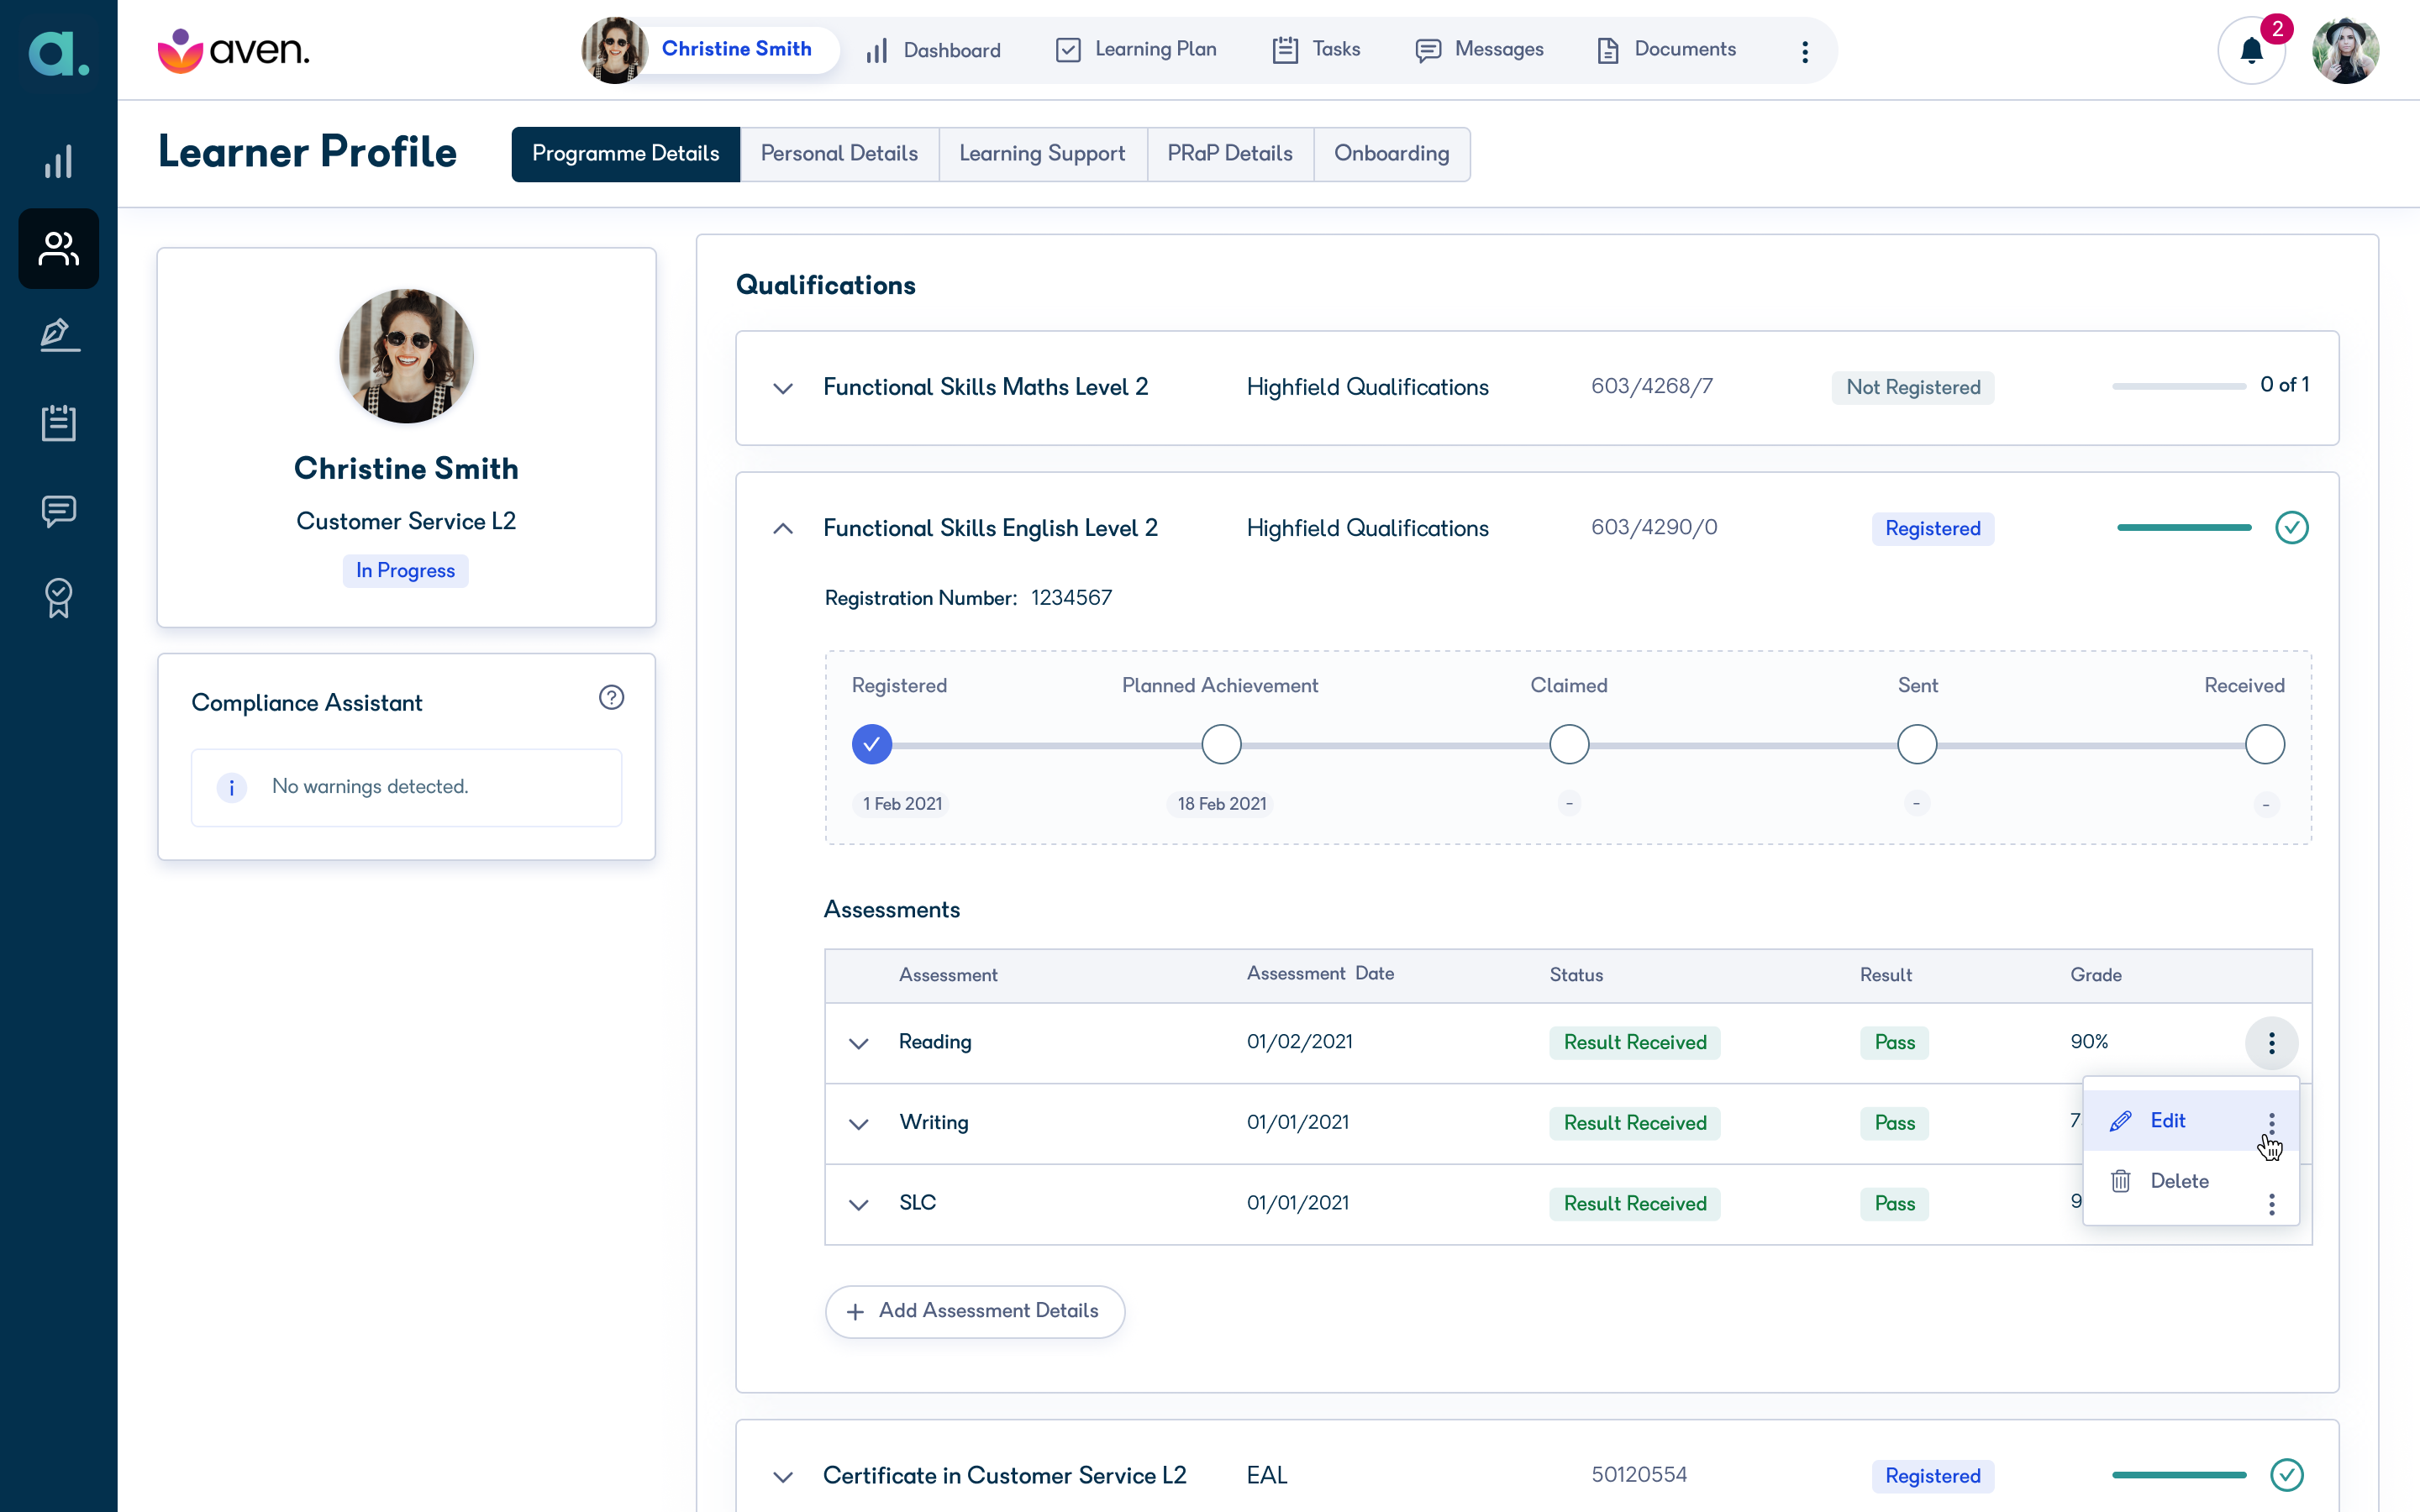
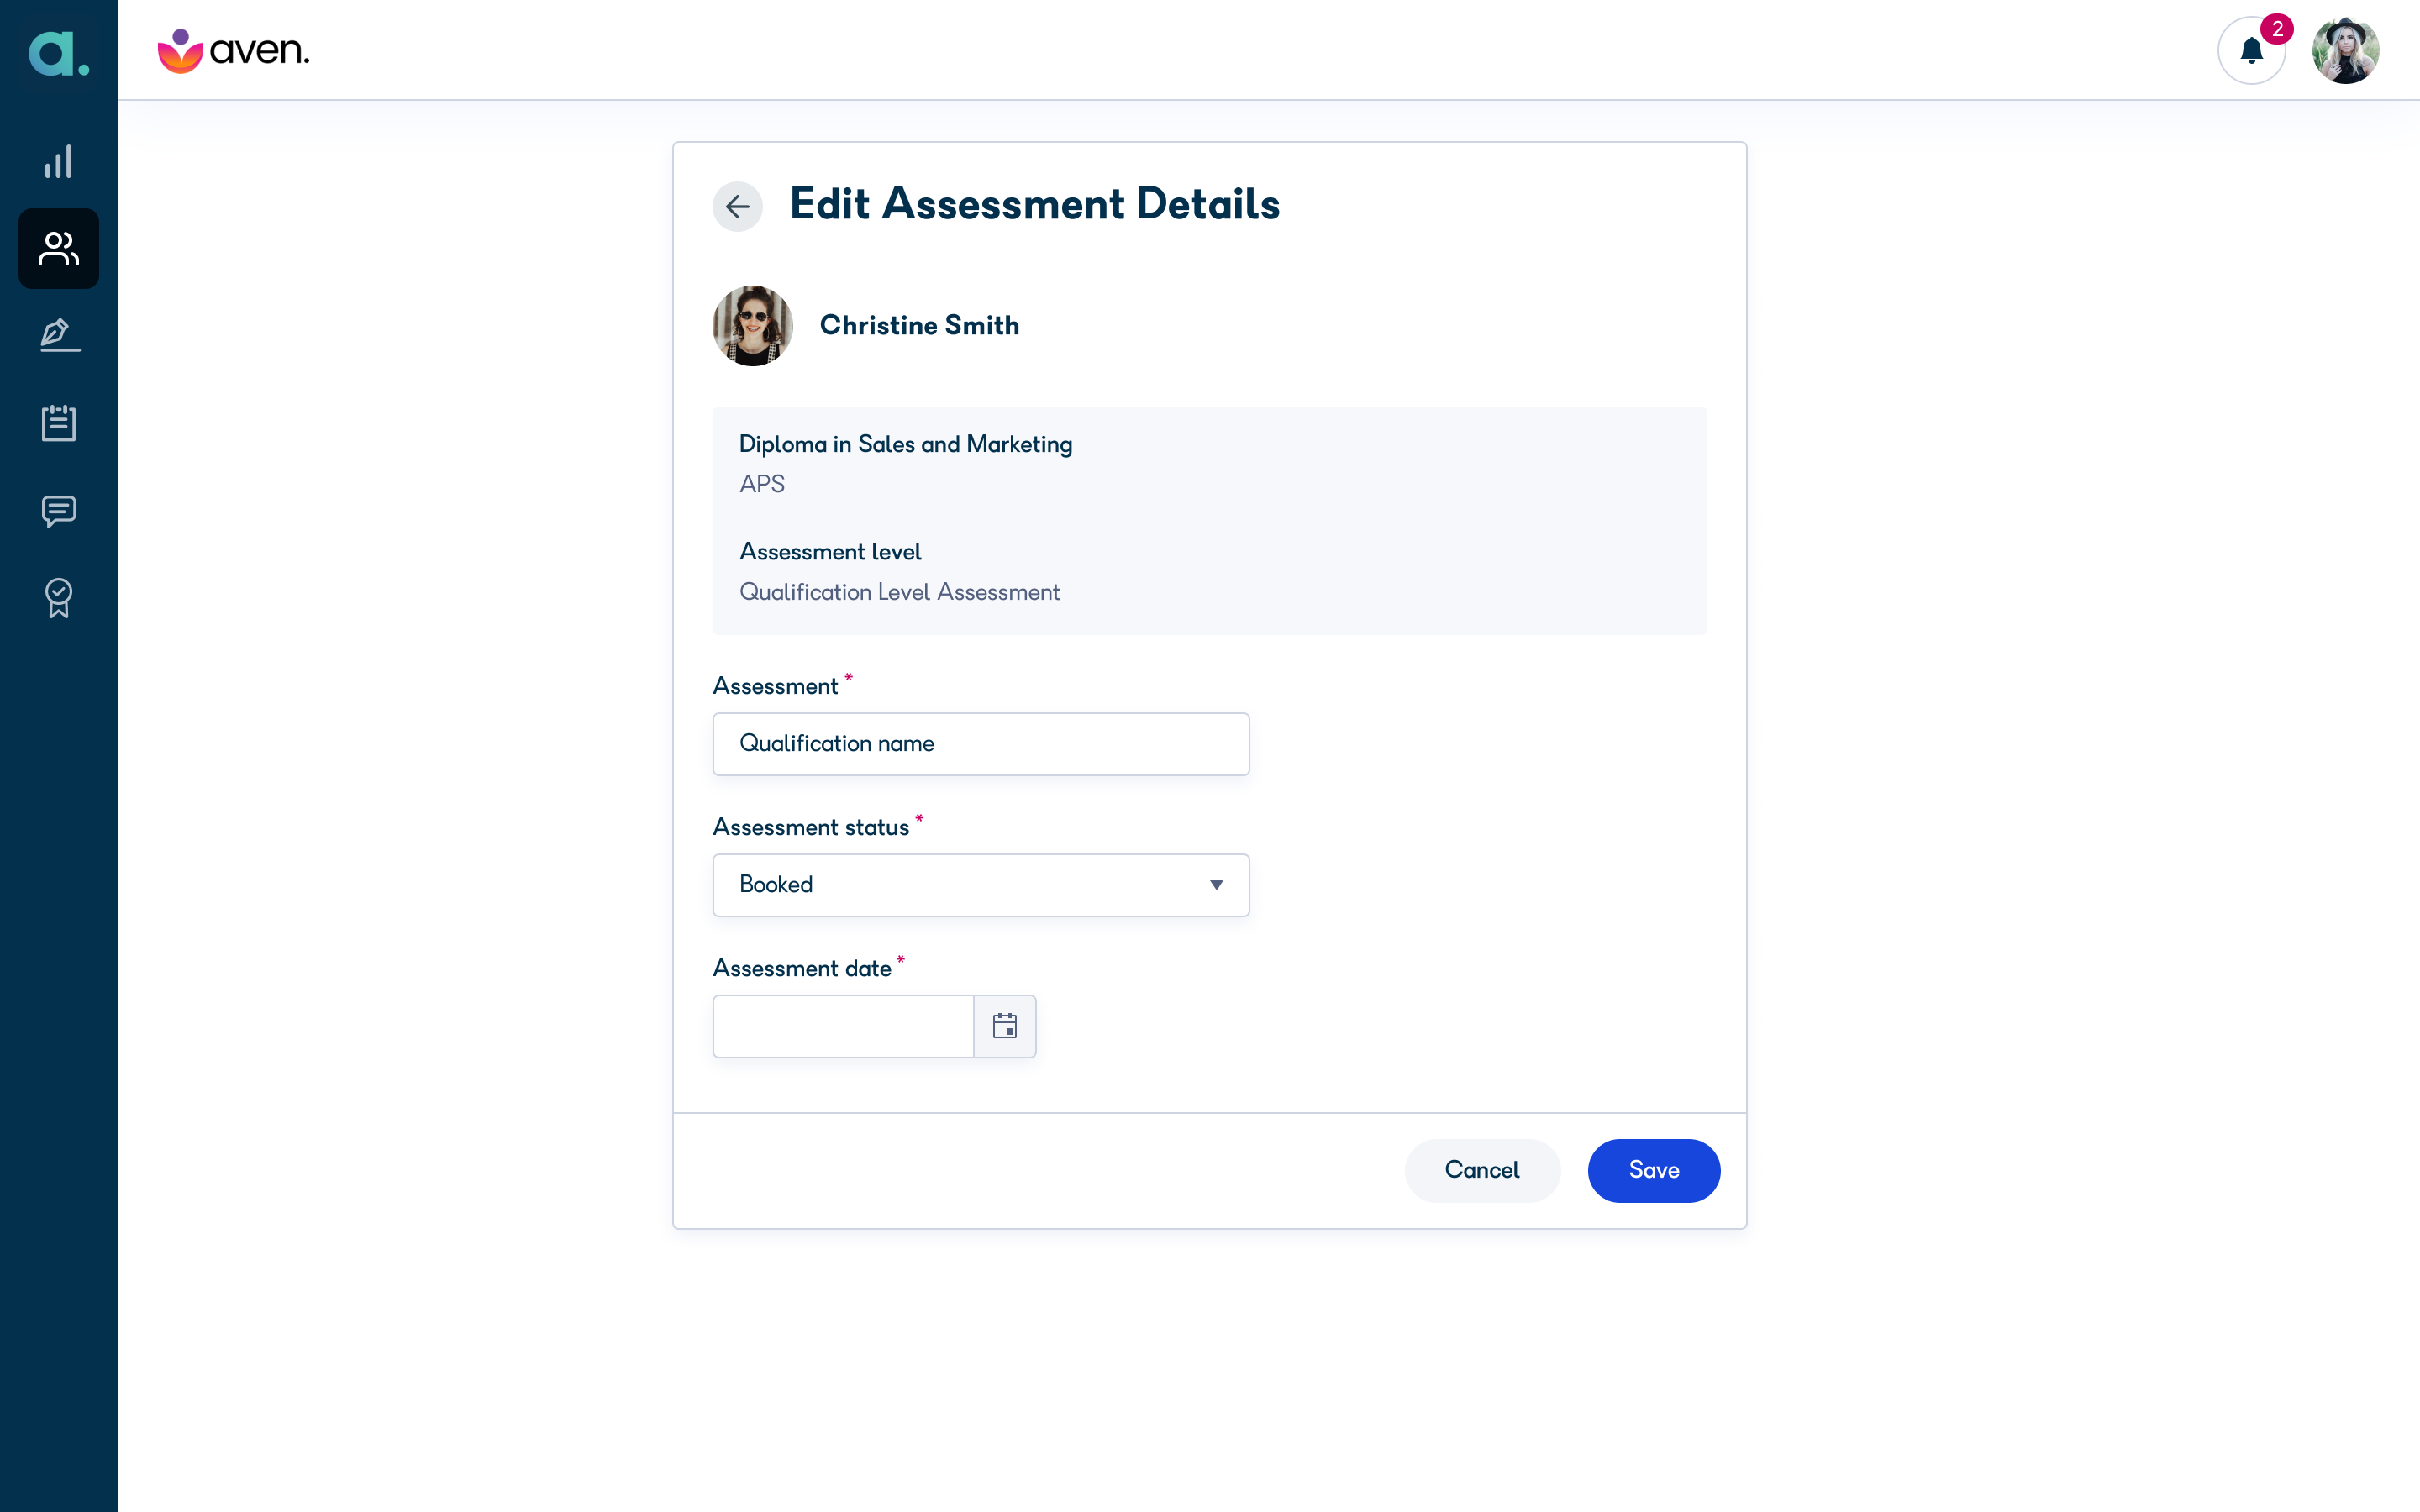
Edit an Assessment record
As a Tutor, you can edit and record the details of an assessment from within a learner's record on their profile. To edit an assessment, navigate to the assessment card, and click the options icon ⋮ on the far right. Select Edit.
On the Edit Assessment Details screen, you can view the prepopulated Qualification and the Assessment level details. For unit or outcome level assessments, the unit name is also displayed.
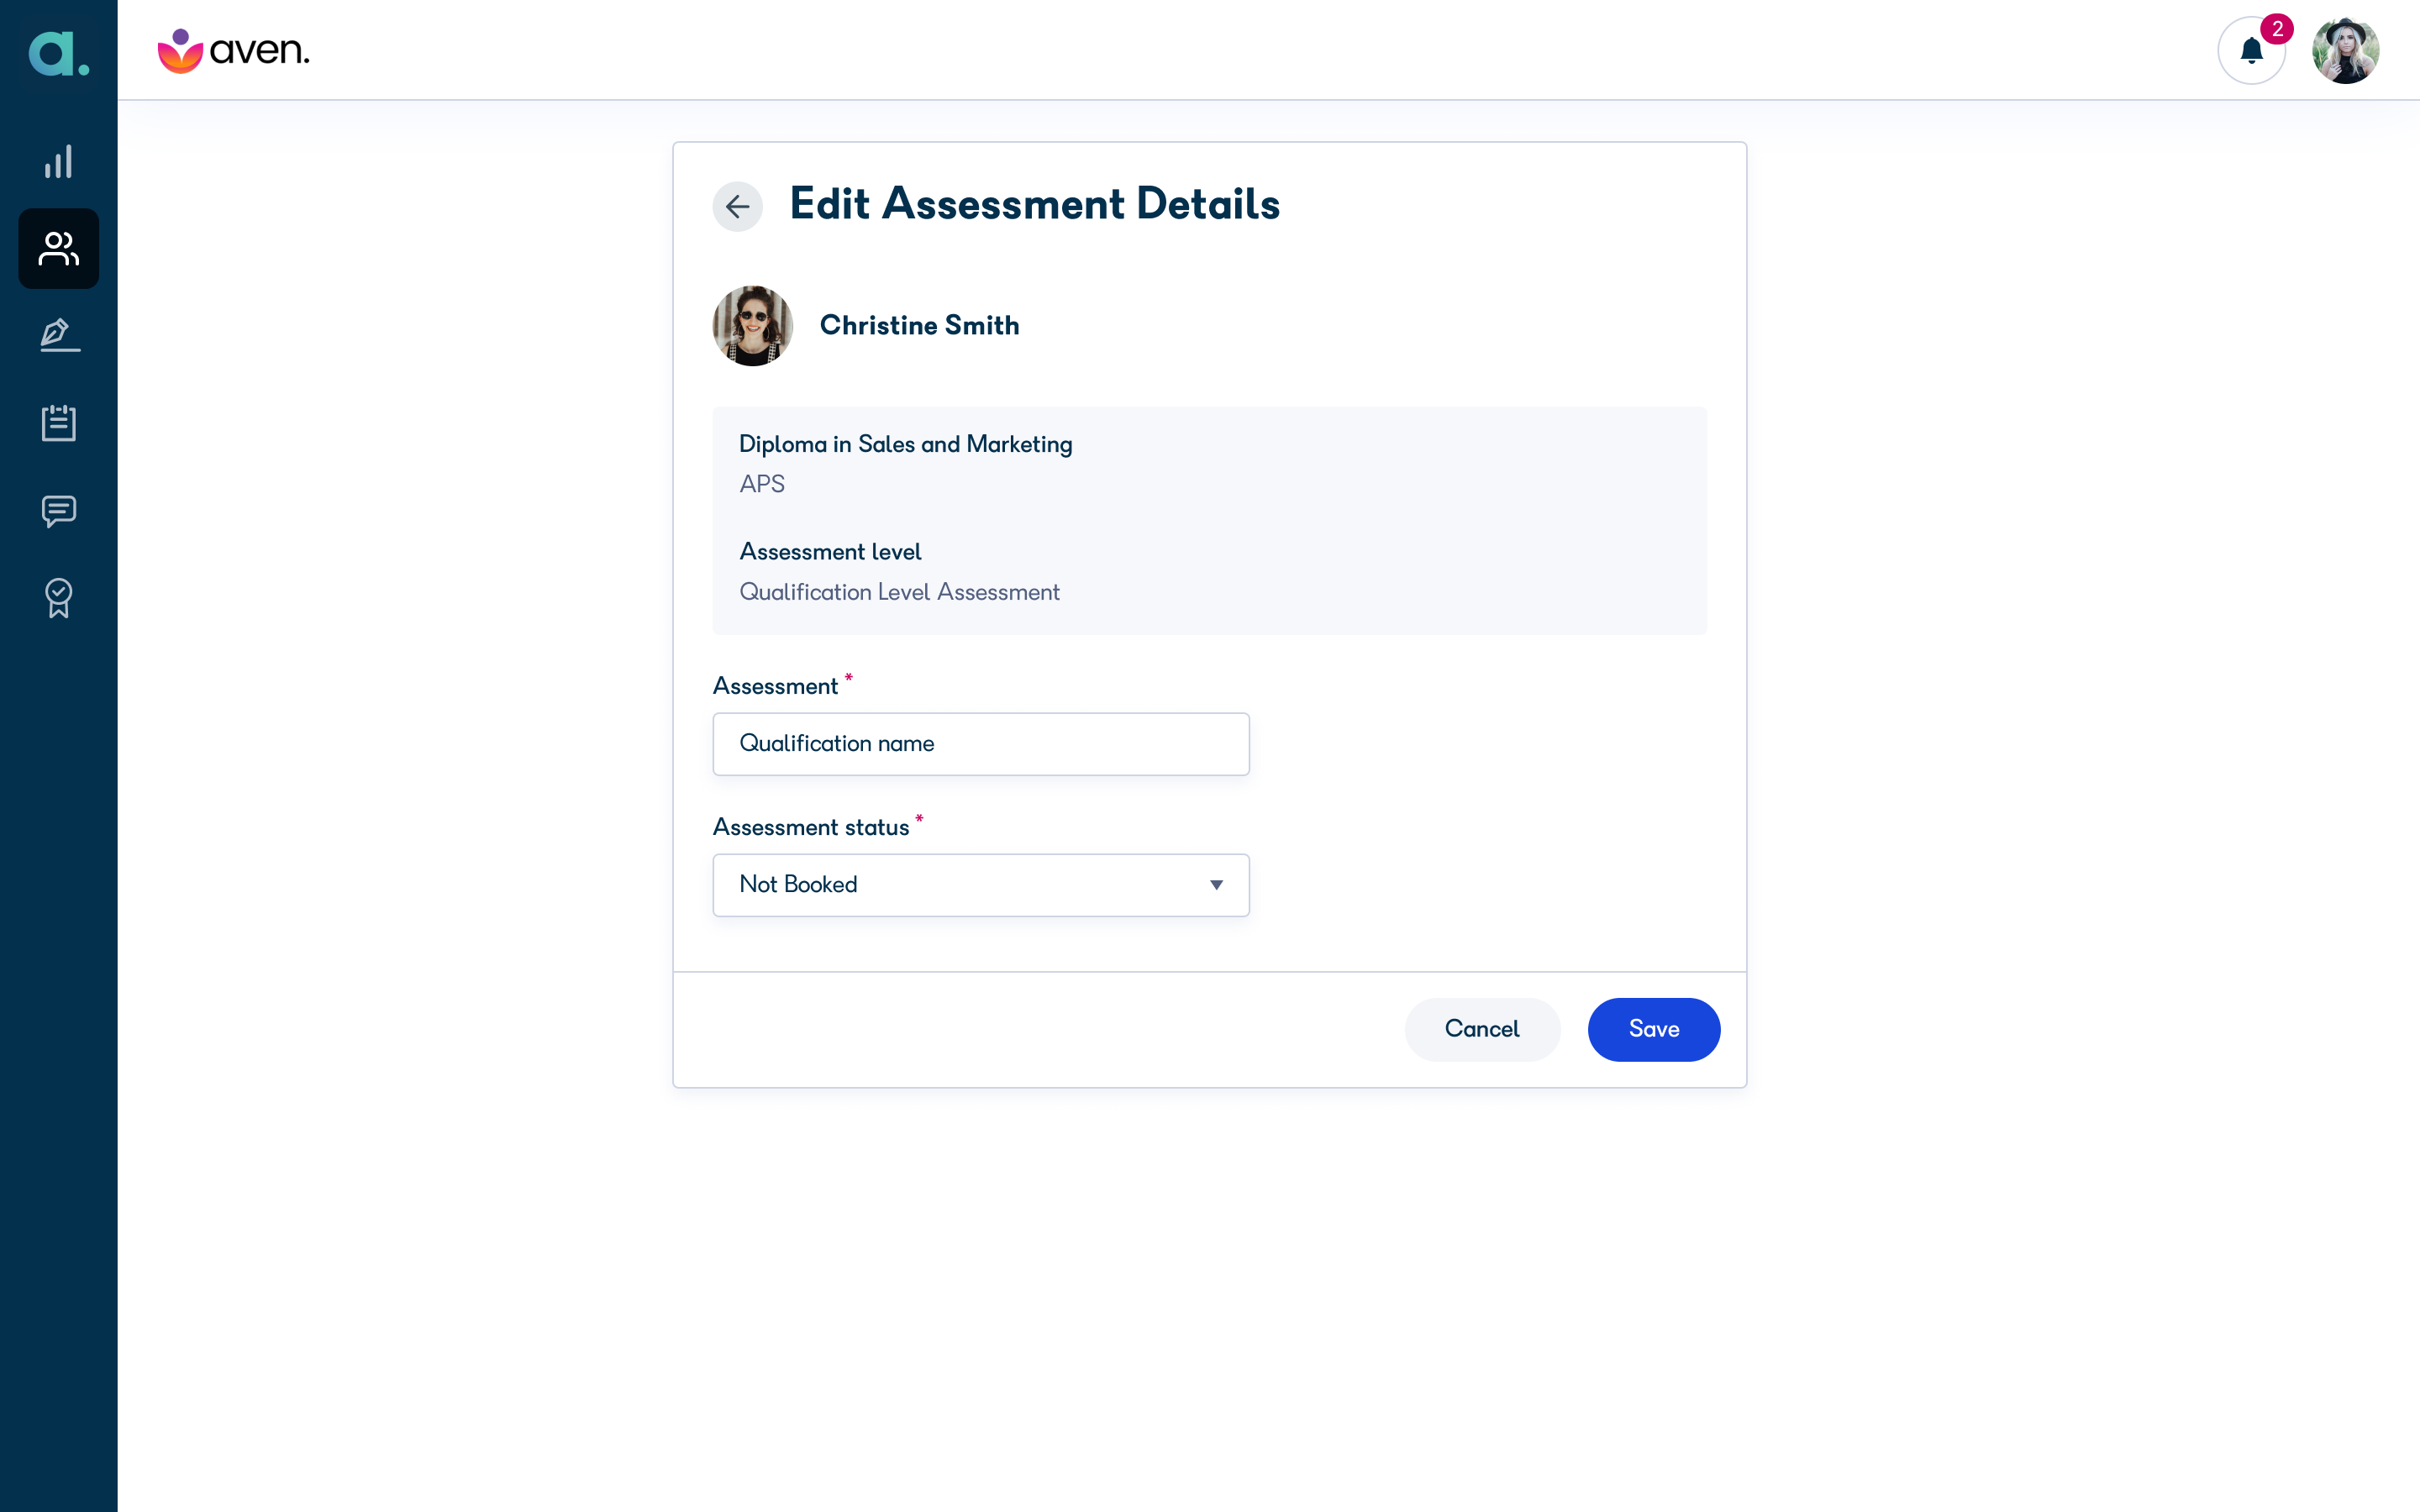
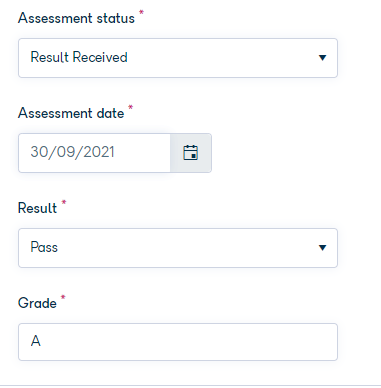
When you change the status, you will be presented with additional fields to complete.
If you select the Booked status, you must then enter the actual date when the assessment is going to be taken.
If you select the Awaiting Result status, you must enter the date of the assessment.
If you select the Result Received status, you must enter the date of the assessment, along with the Result and Grade.
After you enter the assessment record details, click Save.
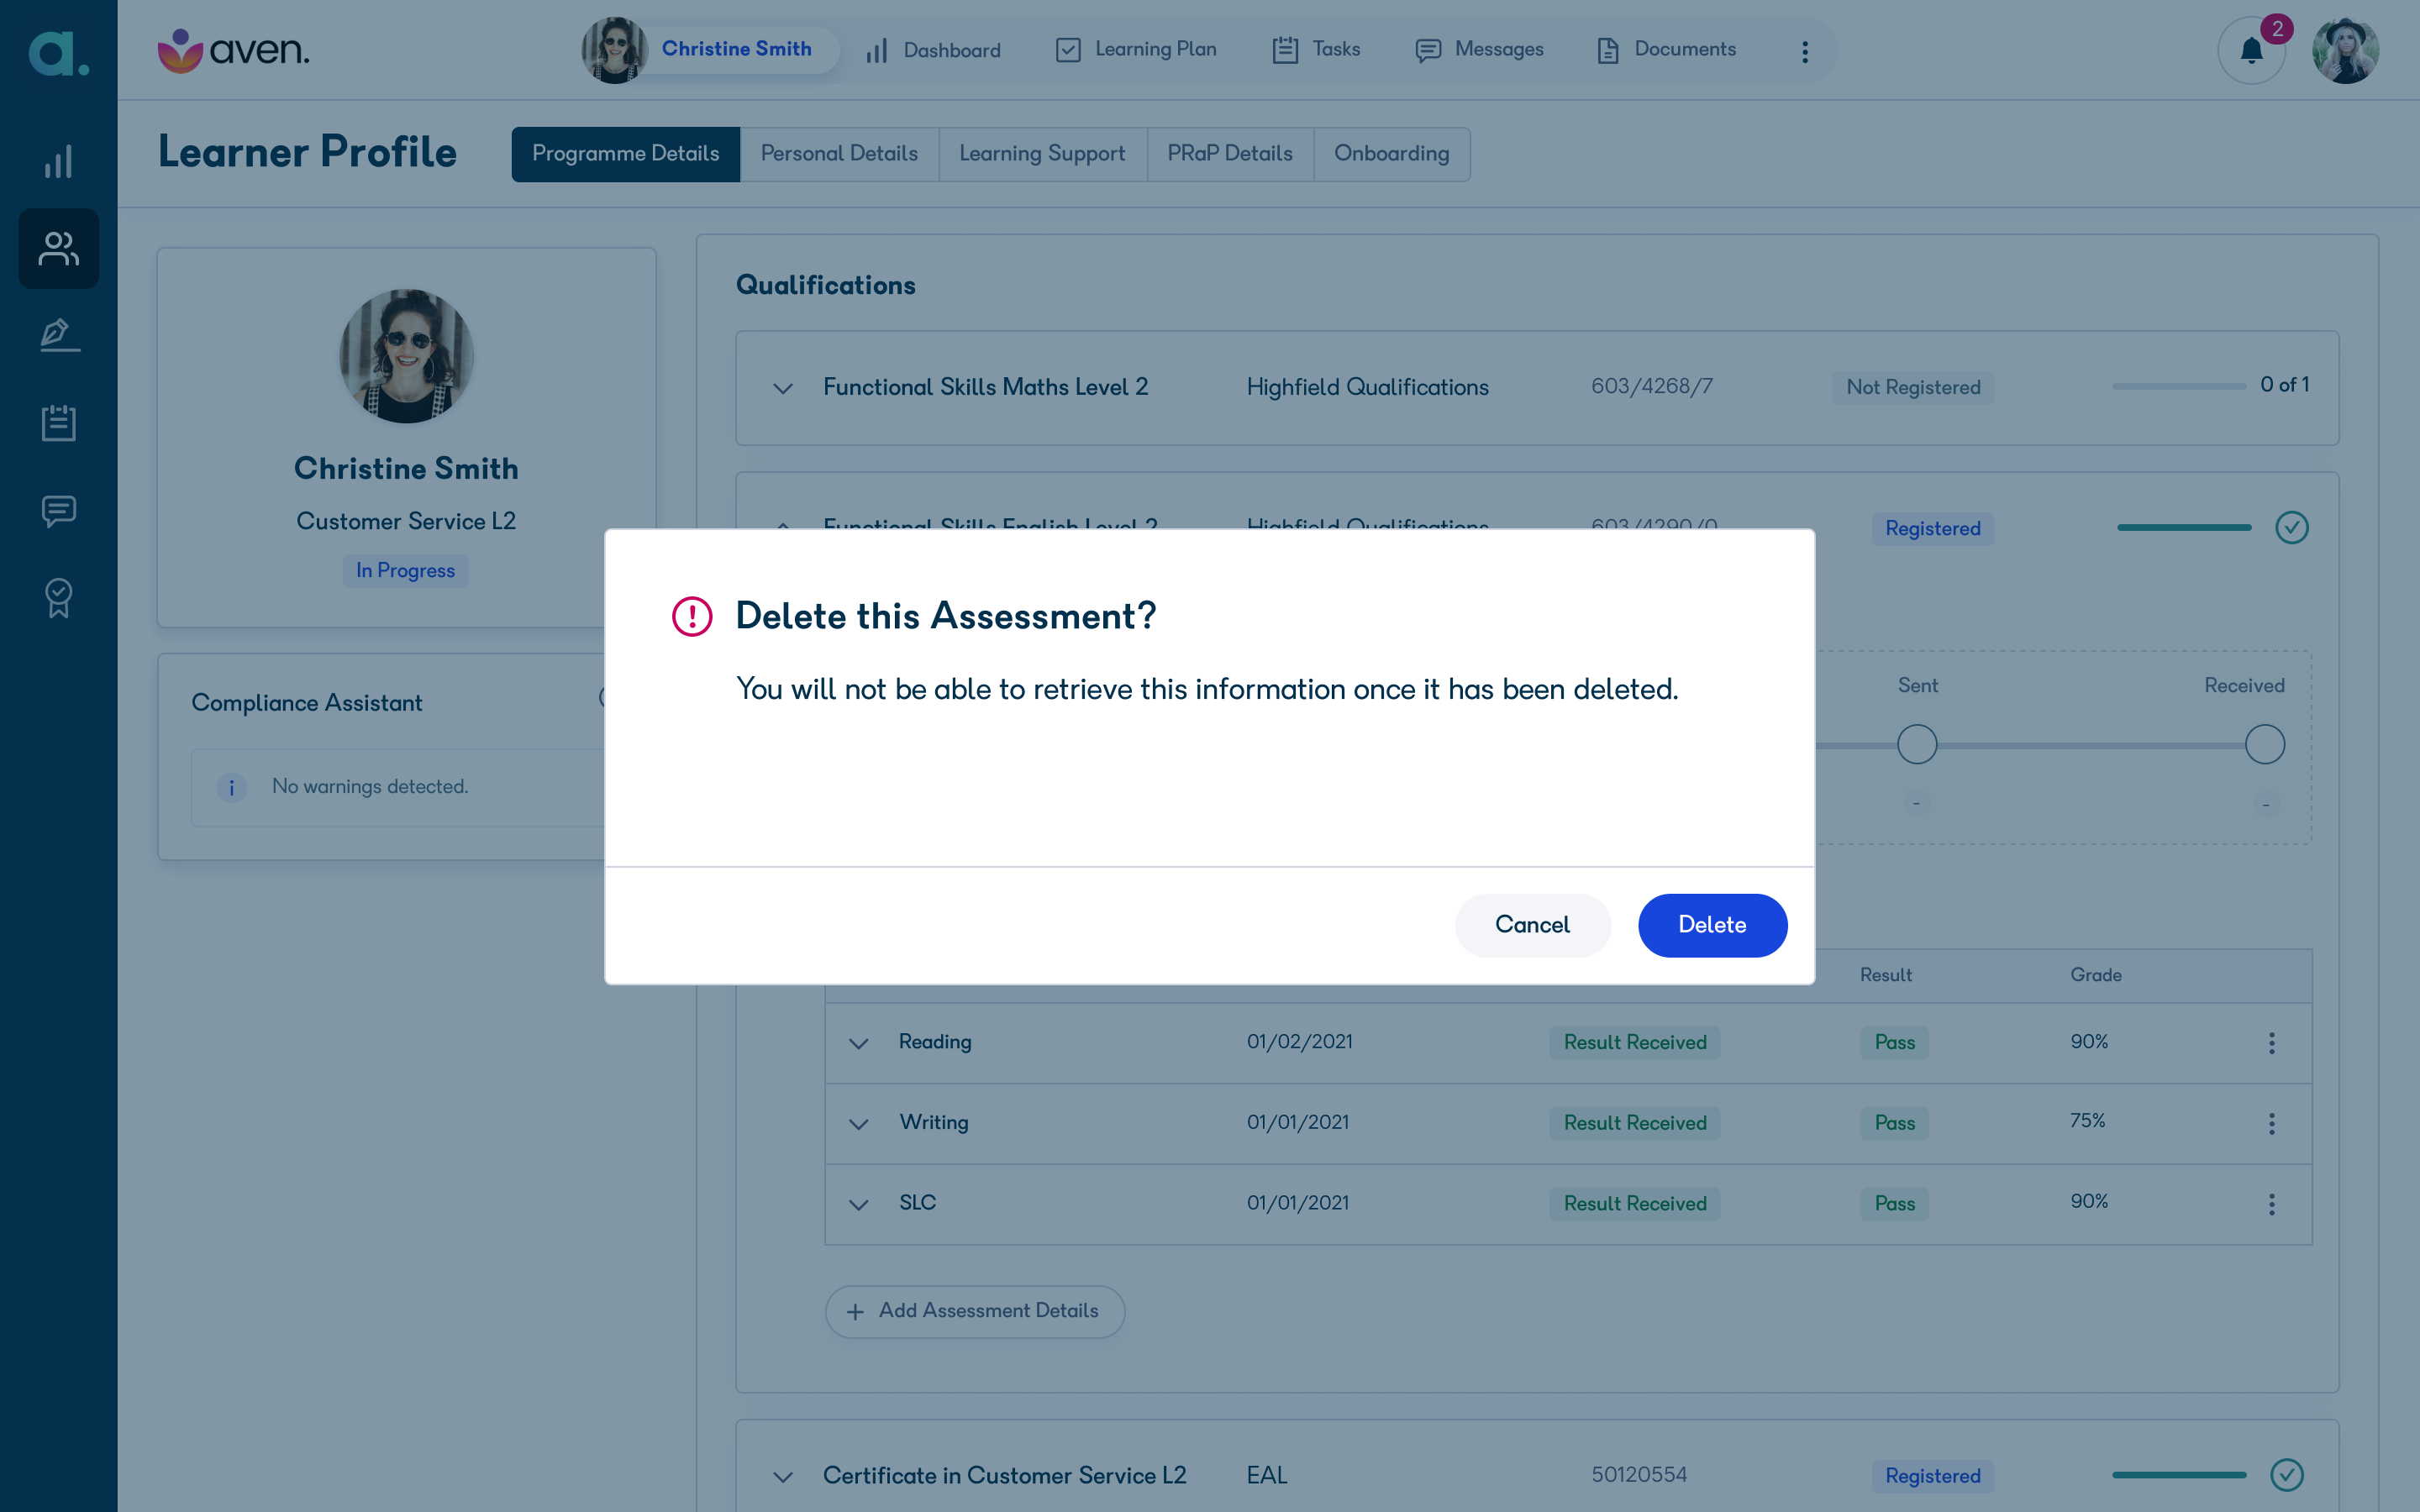
Delete an Assessment record
To delete an assessment, navigate to the assessment card, and click the options icon ⋮ on the far right. Select Delete.
You will see a warning message. Click Delete to delete the assessment record.